
Scenario for Blender: user guide
Scenario for Blender brings Scenario's generation models into Blender. You need Blender 5.0 or later, a Scenario account with API access (see the Scenario documentation) and an internet connection.
The illustrated guide (PDF, 25 pages, version 1, 2026-10-20) covers every lane, input and result.
From your scene
- A prompt or reference files
- Viewport capture
- Scene camera view
- Playblast of your animation
- Selected mesh
Scenario models
Mesh edits remesh, retexture, UV unwrap, rig, animate, split into parts
Generate price in credits shown first
Back in Blender
- Images as datablocks and textures
- Meshes at the 3D cursor or beside the original
- PBR texture sets on a material slot
- Video and audio for the Sequencer
- 360 panorama as the scene World
- Greybox layout in a Blockout collection
The extension is experimental: check the known limitations
before you rely on a feature. This handbook describes the newest release; the
release notes list what each release contains, and each automated
release attaches the handbook for its version as scenario-handbook-<version>.html.
The documentation index covers the technical details.
Screenshots may show earlier layouts, and prices in them are examples, not quotes. Select a screenshot to enlarge it.
What it does
From one tab in Blender's 3D viewport, you can:
- generate images, videos, 3D models, PBR materials, audio and 360 environments;
- render your scene as a finished still or clip;
- edit meshes you already have: remesh, retexture, UV unwrap, rig, animate or split into parts.
Inputs come from your scene: a viewport capture, the scene camera, a playblast of your animation or the selected mesh. Results come back where you work: images as datablocks and textures, meshes at the 3D cursor or next to their original, materials as texture sets you apply to a mesh material slot, and videos and audio in your Output Folder, ready for the sequencer. The Generate button shows the price in Creative Units (CU) before you spend anything; see Costs.
Model names below are examples; what's available depends on your access and each model's current settings. Scroll sideways through the panels; select a panel to enlarge it, or its name to read its section.
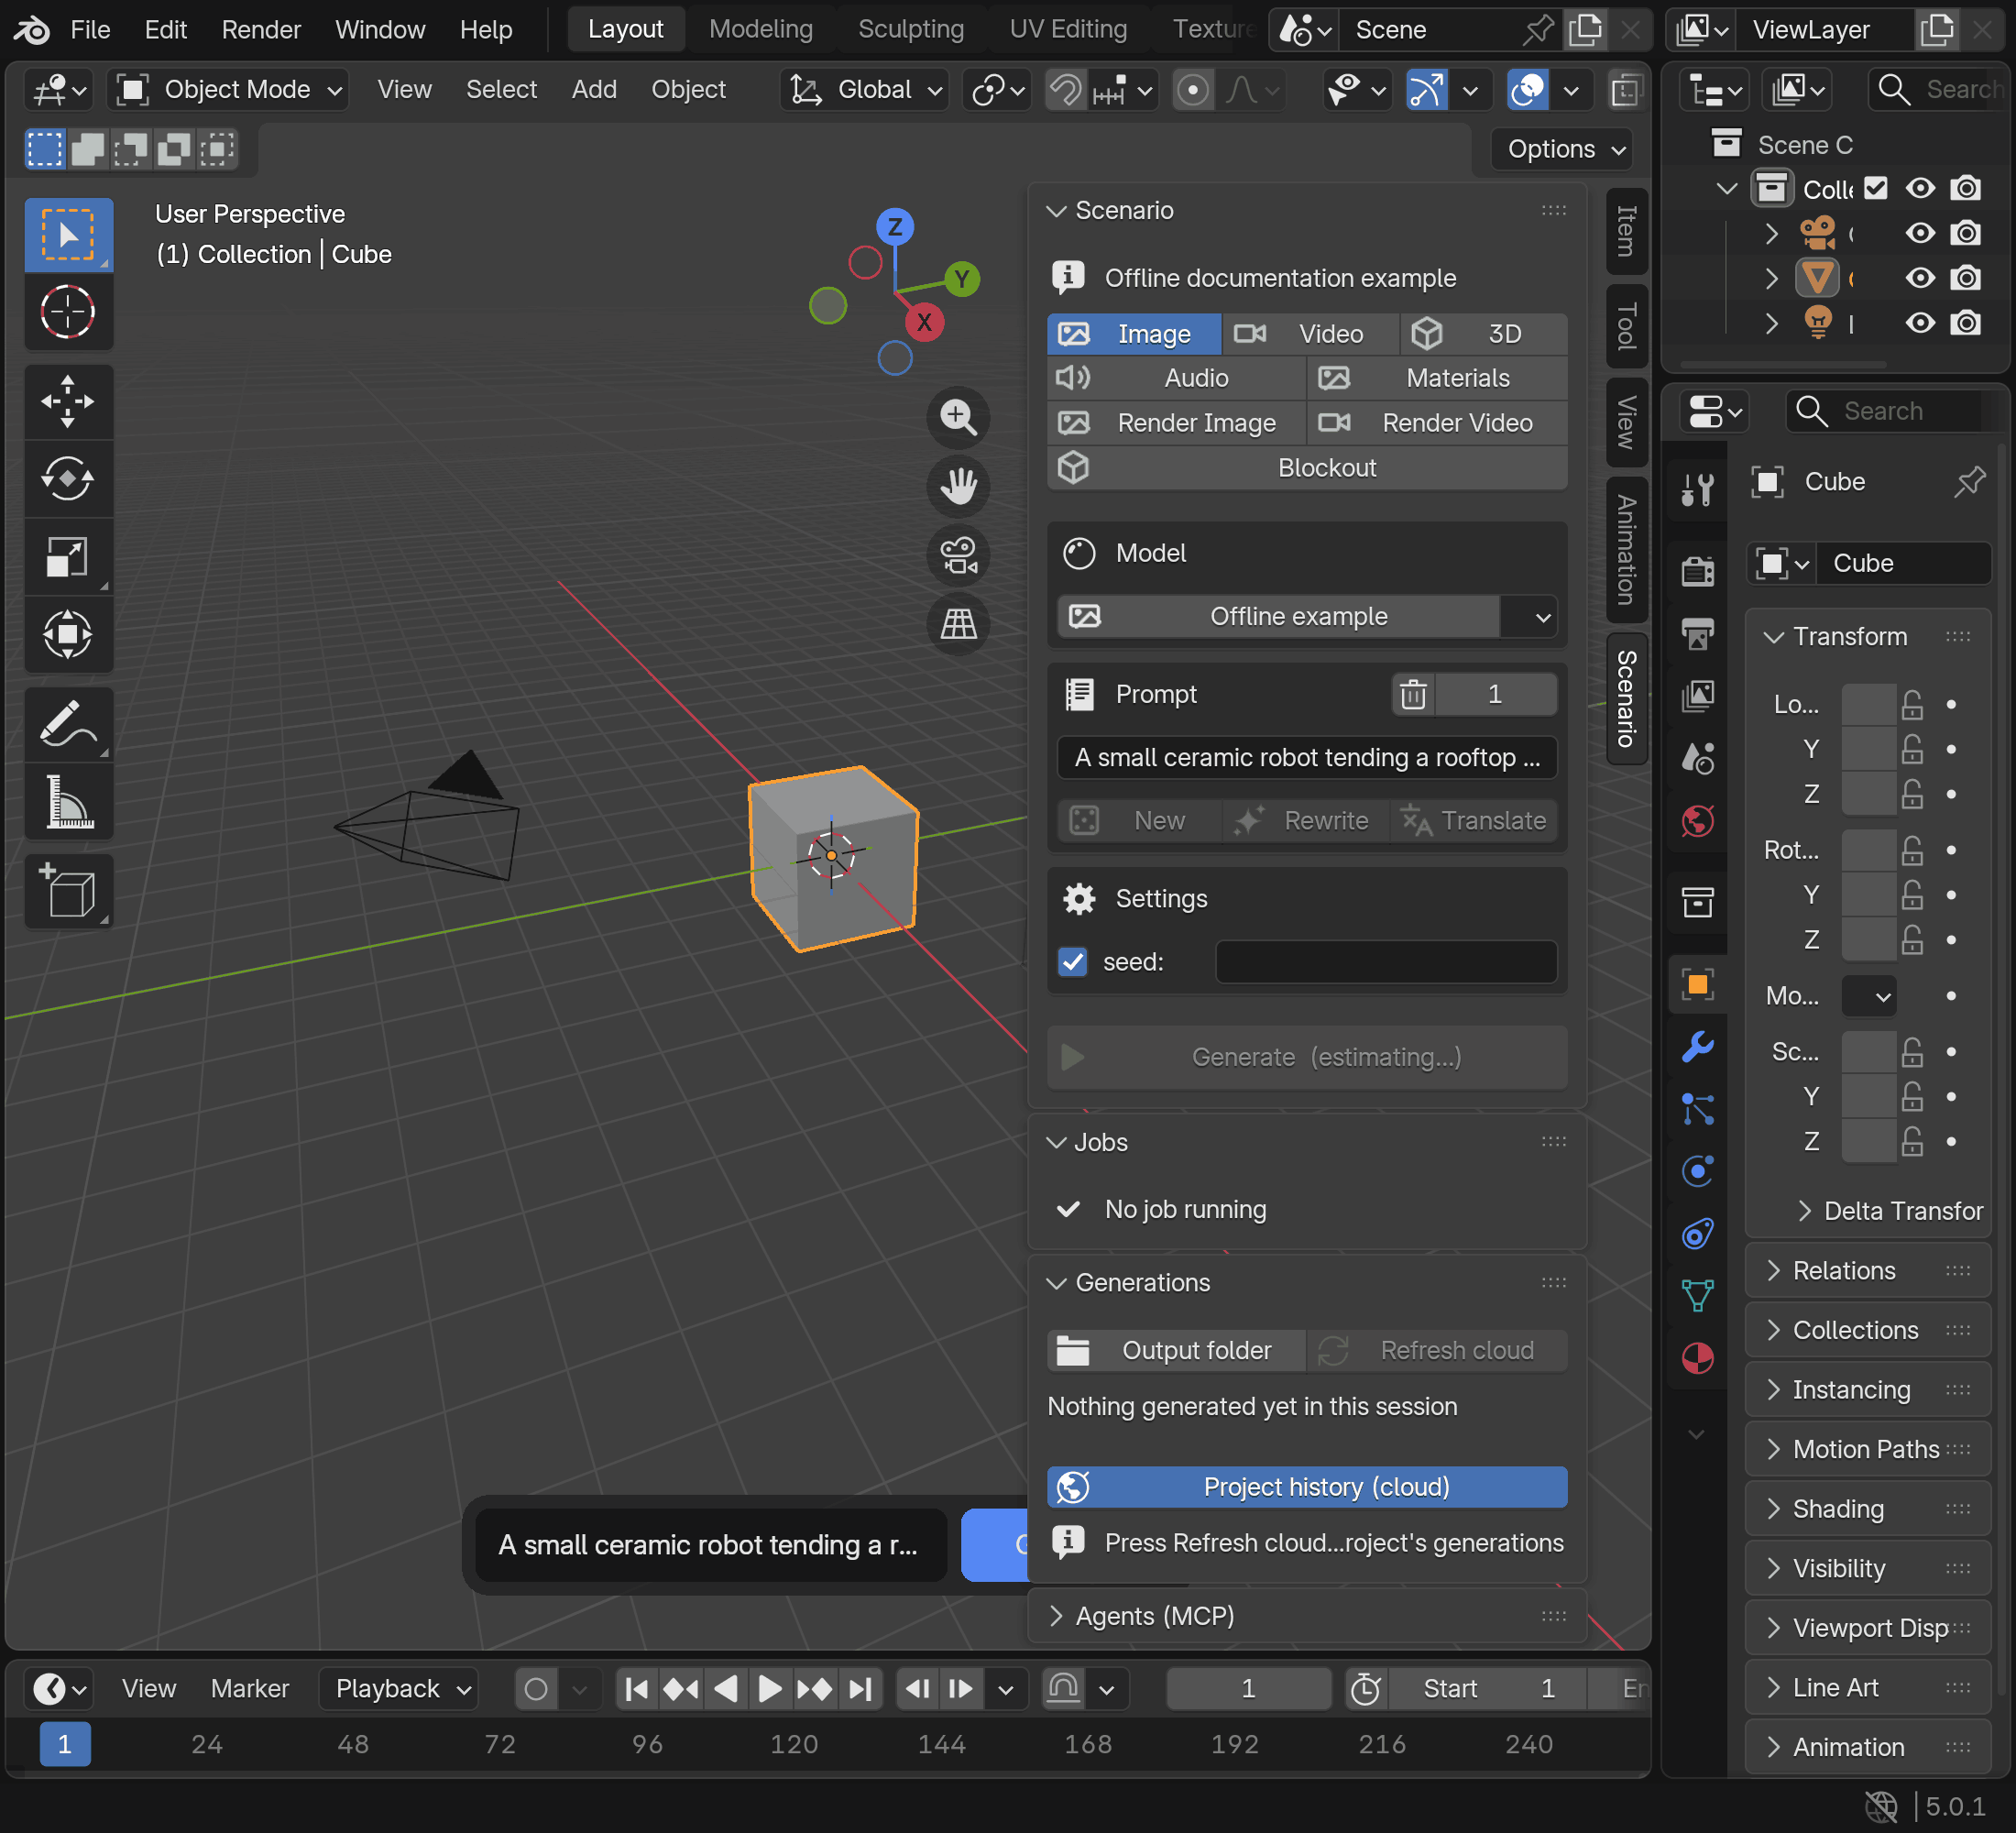
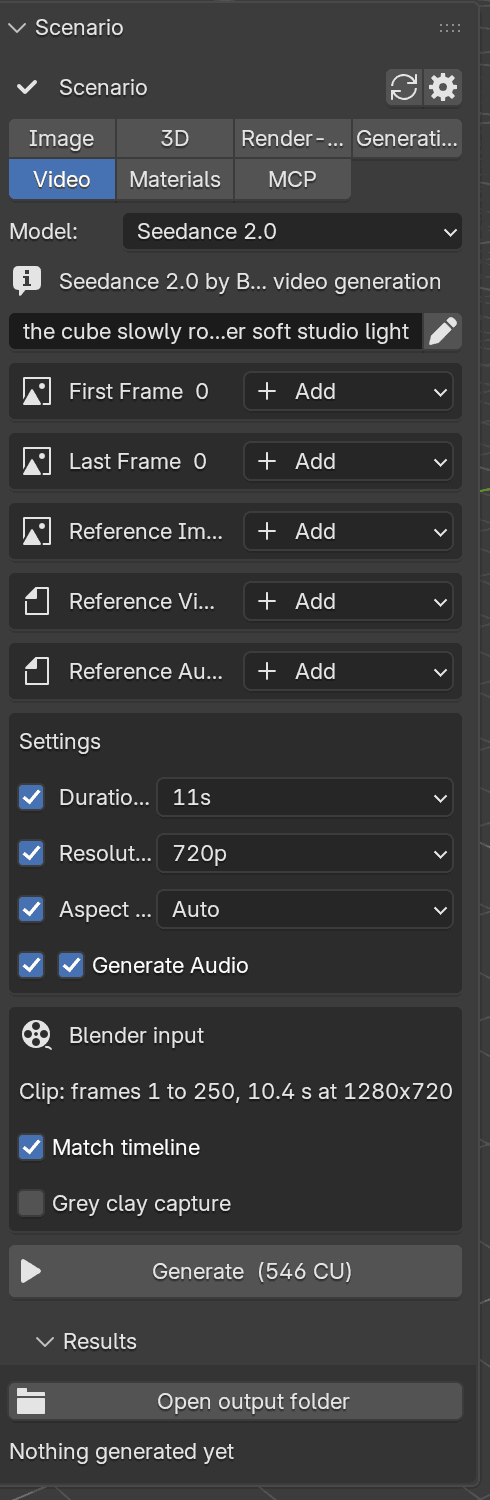
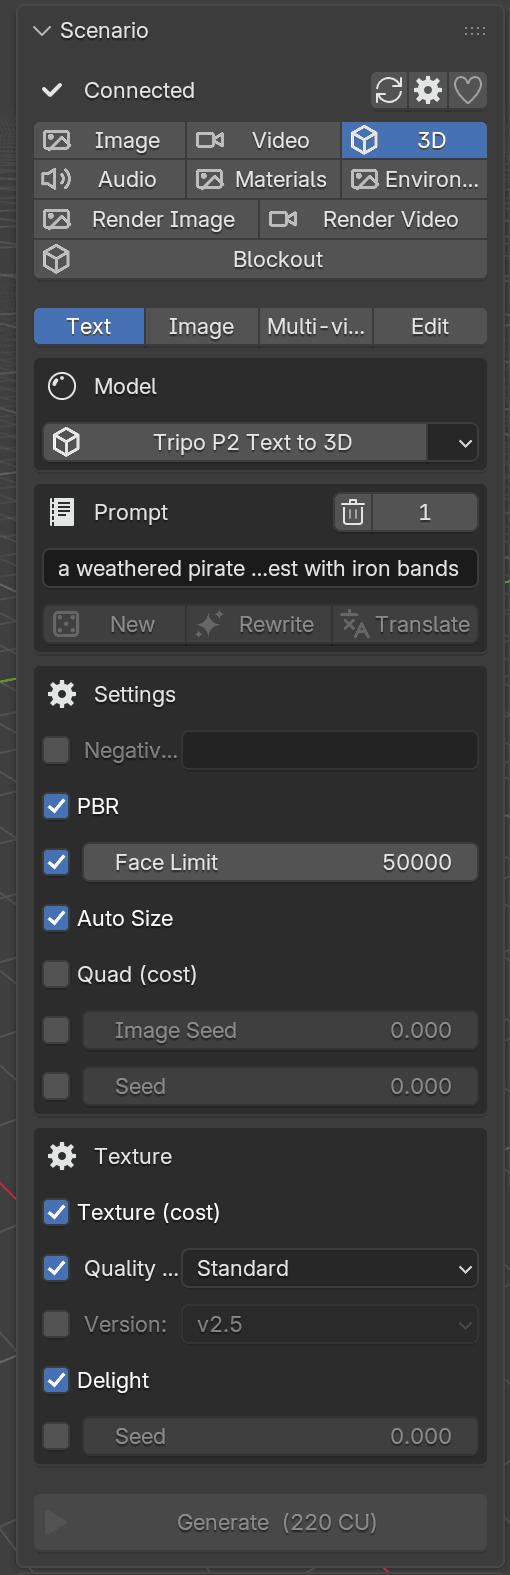
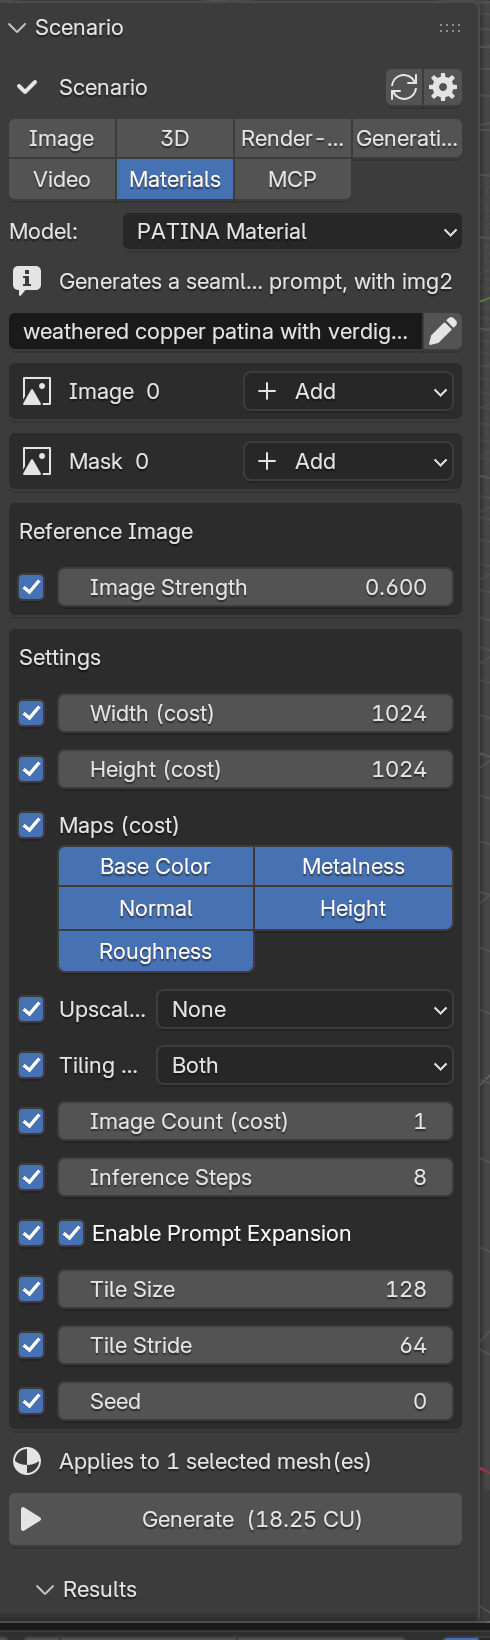
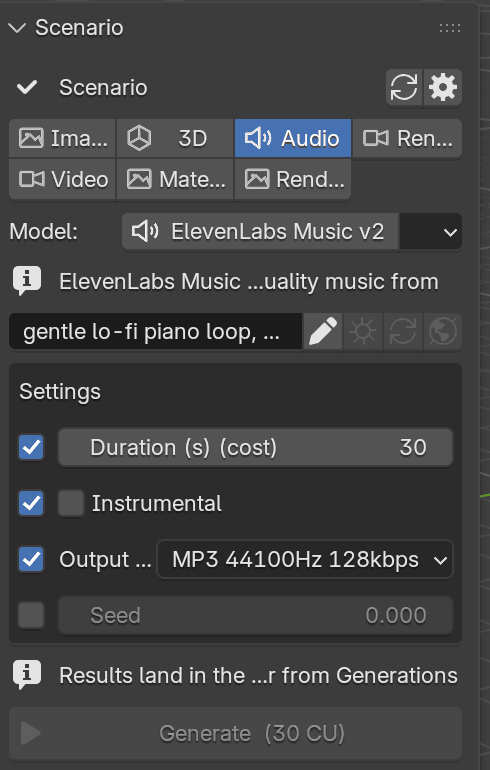
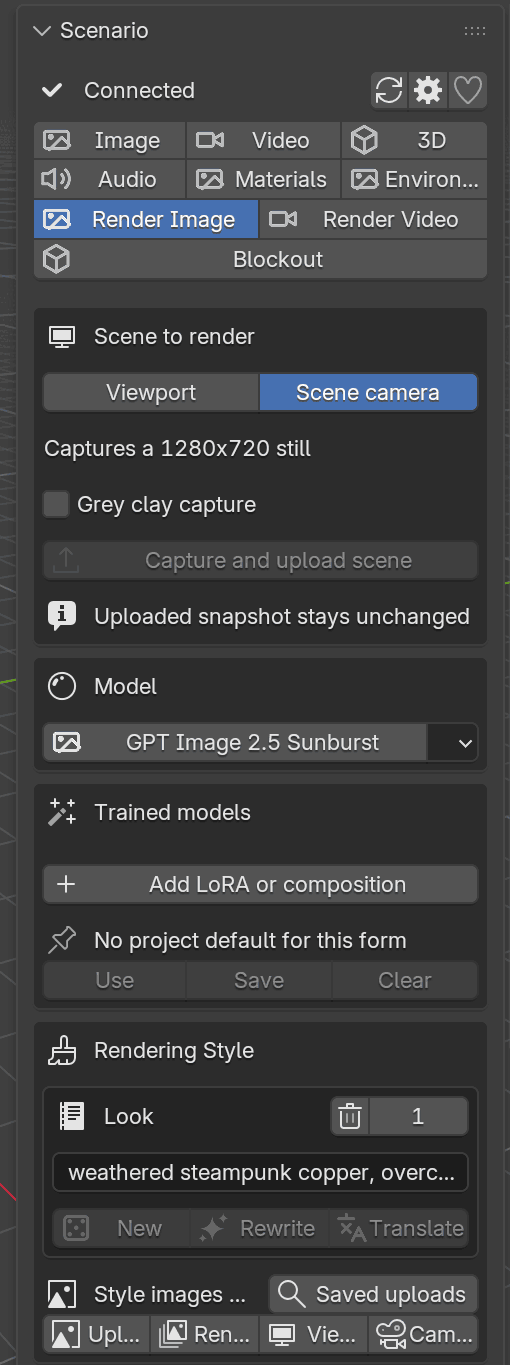
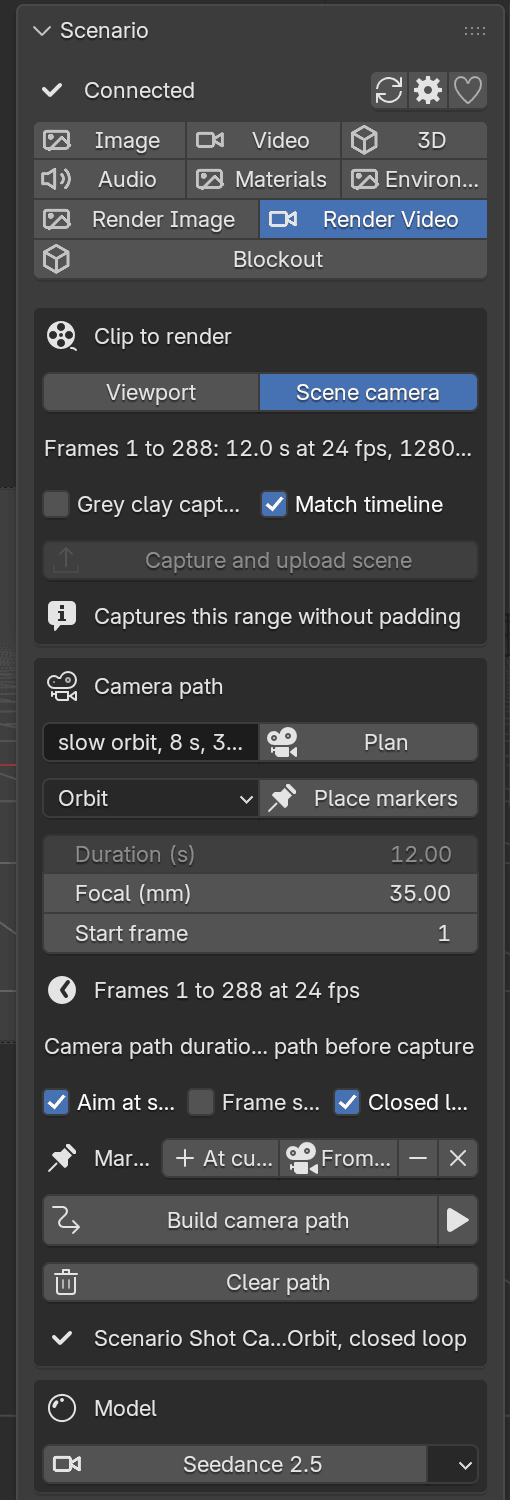
A small local MCP server also lets an agent such as Claude Code, Cursor or Claude Desktop read your scene, run tools in Blender (including planning a camera move) and generate with Scenario; see Agents (MCP). Each square below is one of its tools, grouped by family. Hover over or tap a square to see its name.
11 Scene
scene_summaryobject_detailexecute_pythonselect_objectsset_framescreenshot_viewportcamera_pathrender_stillcapture_viewsblender_api_helpdatablocks_summary
Read, select, frame, capture, render, run Python.
18 Generate & place
prepare_result_applicationapply_result_applicationread_model_textinspect_result_previewsestimate_promptapprove_promptread_prompt_resultlist_modelsmodel_schemamodel_defaultsrender_formestimate_costgeneratejob_statuswait_for_jobimport_resultcapture_referencelist_generations
Models, prices, generation, waits, previews, placement.
9 Library & uploads
list_assetssearch_assetslist_collectionsprepare_asset_organizationapply_asset_organizationasset_organization_statusupload_referencereference_upload_statuslist_reference_uploads
Your Scenario assets and reference uploads.
7 Workflows
list_workflowsworkflow_schemaestimate_workflowrun_workflowdiscard_workflow_estimateworkflow_job_stepsdecide_workflow_step
Run Scenario workflows step by step.
5 Jobs & recovery
recover_reference_uploadrecover_local_joblist_local_jobscancel_prepared_jobrecover_cloud_job
Pick up jobs after a crash or restart.
5 Blockout
estimate_blockoutapprove_blockoutprepare_blockout_planblockout_plan_statusapply_blockout_plan
Prompt to grey layout, priced and approved.
33 Film experimental
prepare_film_compositionfilm_composition_reviewestimate_film_compositiongenerate_film_compositionprepare_film_reviewfilm_review_statusbuild_film_reviewfilm_export_sourcesprepare_film_exportrender_film_exportfilm_export_reviewfilm_case_study_sourcesprepare_film_case_studyexport_film_case_studyfilm_case_study_reviewfilm_capture_sourcesprepare_film_capturerender_film_capturefilm_capture_reviewupload_film_capturefilm_timeline_sourcesprepare_film_timelinefilm_timeline_reviewbuild_film_timelinefilm_shot_sourcesprepare_film_shotfilm_shot_reviewbuild_film_shotfilm_recipeestimate_film_taskapprove_film_taskdiscard_film_estimatebind_film_upload
Shots, timeline, capture, composition, review, export.
For ideas, browse the explorations made in Blender.
Install
Install Scenario from its official extension repository so that Blender can offer you its updates:
- Turn on Allow Online Access under Edit > Preferences > System > Network. Blender needs it to reach the repository, and Scenario's network actions don't run without it.
- Open Edit > Preferences > Get Extensions > Repositories, choose Add Remote
Repository and enter
https://blender.scenario.com/repo/index.json. - Find Scenario in Get Extensions and install it. Blender installs and enables it.
- In Scenario, open Organization settings > API Keys > Add API Key and copy the key and its secret. The API-key quick start lists the account requirements.
- In Edit > Preferences > Add-ons > Scenario, leave Credentials on Saved
in Blender, paste the key and secret, and press Test connection. Pick
an Output Folder (default
~/Downloads/Scenario). To use your Scenario account without a key, skip step 4 and choose Sign in with Scenario, which opens your browser.
Then press N in the 3D viewport and open the Scenario tab.
Installing from a ZIP instead. Download scenario-<version>.zip from the
releases page, keep it
zipped (you can verify it first) and drag it onto a
Blender window, or use Get Extensions > Install from Disk. Then continue with step
4. A ZIP copy never updates itself: install each new release ZIP the same way and
restart Blender. Never keep a ZIP copy and a repository copy installed together;
to move to the repository, see
Switch from a ZIP to the repository.
Historical v* ZIPs are earlier experimental builds that may differ from this
guide; follow the instructions attached to them.
Credentials and project
- Sign in with Scenario opens your web browser on Scenario's sign-in page and keeps the session in the extension's private state folder, refreshed in the background. It then asks which team and project your work goes to, or uses your only project when you have one; nothing runs on the account until a project is chosen. If the chosen project is deleted, Blender asks again. The account row of the Scenario sidebar shows the choice and switches it. Sign out forgets both.
- Saved in Blender keeps the key and secret in Blender's preferences, masked on screen but not in an OS keychain.
- Environment reads
SCENARIO_API_KEYandSCENARIO_API_SECRETfrom the environment that launched Blender, which suits automation. Both are required.
The two key sources never mix: environment values are ignored while Saved in Blender is selected, and a missing value is never borrowed from the other source. The account strip tells you when the selected source lacks its key or secret.
Create the key in the Scenario web app under Settings > Organization > API Keys. Creating a key takes a team admin or the project's owner, and the secret is shown only once, right after creation; see API keys and scopes.
Test connection checks in the background that your credentials can read Scenario's models. It doesn't tell you which account or project the key belongs to. A 401 (rejected) or 403 (access denied) means you should check the key and secret; after a 403 with a Project ID set, also check that the project belongs to the key. A 429 means too many requests: try again shortly. Other HTTP failures show only their code. Error messages never include service responses, credentials or IDs.
Project ID (optional) works with either key source. Leave it blank to use the key's default scope, or enter a project you are allowed to use. It's an override, not a way to gain access: a malformed ID is rejected, and a permission error never falls back to the default project. The ID is saved with Blender's preferences.
Changing the project clears the visible catalog, history and prices, and retires pending approvals. Jobs already submitted keep their original credentials and project, so switch back to inspect or recover them.
Updates
Edit > Preferences > Add-ons > Scenario > Updates shows your version and whether the official repository is set up. With Allow Online Access on:
- Set up official repository shows while the repository is missing or turned off. It adds it, or turns the existing one back on, never a second copy.
- Check for updates takes its place once the repository is set up. It refreshes the listing and installs nothing.
- Open Get Extensions opens Blender's extension manager, where you install or update. It lists only releases for your Blender version and platform, and shows download errors.
If no compatible release appears, keep your version and read the release notes. A listing left over from a failed check doesn't prove you're up to date; retry once online. Restart Blender when asked. A repository copy updates in place and keeps its preferences and jobs; save Blender's preferences yourself if they don't save automatically.
A ZIP copy never updates from the repository, even after Set up official repository; its Updates panel says it was installed outside it. Keep updating it with Install from Disk into the same local repository, or switch to the repository.
If Scenario disappears, Updates controls included, after you disabled its repository, enable that repository again under Get Extensions > Repositories (Scenario can't do it while unloaded). Don't remove it or install a second copy to recover.
This handbook lives at blender.scenario.com, which the Website link in Get Extensions opens; its downloads page lists the latest release for each supported Blender version and platform. Scenario targets Blender 5.0, 5.1 and 5.2.
Switch from a ZIP to the repository
A ZIP copy and a repository copy are separate installations: credentials, preferences and stored jobs don't move between them.
Uninstalling a copy makes Blender delete its storage, including the media behind
the video, sound and Film review strips Scenario added to your scenes. Images and
models in a saved .blend file and your Output Folder are untouched. If you
rely on such strips, keep the ZIP copy, or relink each strip afterwards to its
original in your Output Folder: the file name contains the asset ID stored in
the strip's scenario_asset property.
- Let running generations finish: the new copy won't track them.
- Uninstall the ZIP copy from Get Extensions and restart Blender.
- Follow Install, steps 1 to 3. Skip adding the repository if it's already listed.
- Enter your key, secret, Project ID and Output Folder again.
Your past generations stay in your Scenario project: turn on Project history (cloud) in Generations and choose Save for recovery on a completed model job to bring it into the new copy.
Verify your download
Automated releases include SHA256SUMS and a build provenance attestation. GitHub
Actions builds the ZIP with Blender 5.0 and validates it on 5.0, 5.1 and 5.2; this
checks the package, not runtime compatibility. Historical v* releases have
neither.
Download the ZIP, scenario-handbook-<version>.html and SHA256SUMS into one
folder, then run sha256sum -c SHA256SUMS (macOS: shasum -a 256 -c SHA256SUMS)
and, with the GitHub CLI,
gh attestation verify scenario-<version>.zip -R scenario-labs/blender-plugin.
Find your way around
- The Scenario tab in the 3D viewport sidebar (press
N, or click Scenario in the viewport header) holds four panels, described below. - The floating composer at the bottom of every 3D viewport is the quick way to type a prompt and generate; see The floating composer.
- Studio, next to Scenario in the header, opens expanded controls.
- The heart in the Scenario panel, or Feedback in Studio, sends Scenario a rating or a message. Tell us what went wrong, under an error, and How's it going?, after ten generations, open the same dialog; answering or closing either hides both for a week. Share anonymous usage data, in the extension's preferences, stays off unless you turn it on; see What leaves your machine.
The four panels:
- Scenario: what to generate. Choose a lane (Image, Video, 3D, Audio, Materials, Environment, Render Image, Render Video, Blockout), then fill in its form.
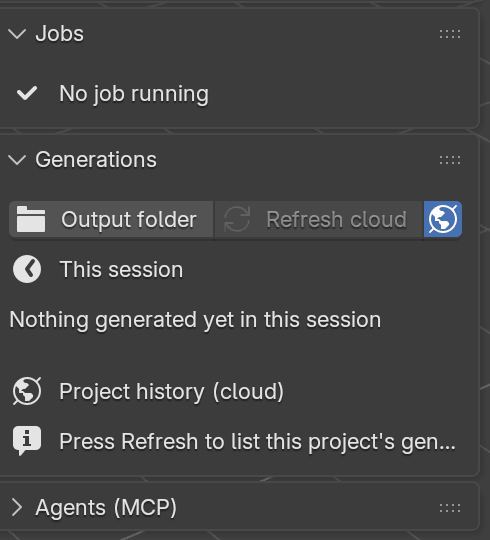
- Jobs: what's running; see Jobs.
- Generations: what came back, then your project's cloud history; see Generations.
- Agents (MCP): the local MCP server, client setups and the Python permission; see Agents (MCP).
The form
From top to bottom:
- Account strip: connection status, a button to reload models, a shortcut to the preferences and the heart, which opens a dialog to send Scenario feedback.
- Model: opens the model picker. Picking a model of another type switches to its lane.
- Prompt: drag the size control to make the box taller. Below it, Prompt Spark's New (writes a prompt for the model), Rewrite (improves yours) and Translate (into English) each show their price first; click Approve... to run it once. The result replaces the prompt only if you haven't changed the prompt, model, scene or credentials in the meantime. The trash button clears the prompt after asking.
- References: one box per file input (image, video, audio or 3D). Add a file with Upload, a still with Render, Viewport or Camera, or a clip with Viewport clip or Camera clip; then Upload reference sends it. For 3D, Upload selected mesh exports your selection. Generate never captures or uploads anything by itself. On the Image, Video, 3D, Materials and Audio tabs, you can also drop PNG, JPEG or WebP files from your file manager onto the Scenario sidebar: they join the first image input with room. If Blender offers more than one action, choose Add as Scenario reference. Drops on the viewport or the composer stay Blender's.
- Parameters: built from the model's own settings. Tick an optional
parameter to send it; unticked, Scenario uses its default. On/off settings are
always sent.
(cost)marks parameters that change the price. - Generate (N CU): the exact price for the form as it stands, refreshed as you edit (checking is free). Generate spends that price once. Pending uploads and captures must finish first.
Prices show up to three decimals, and in compact form from 10,000 CU (12.3K CU).
The approval always uses Scenario's exact price.
Jobs and results explains what happens after you generate. Some features below come from the earlier prototype and are still being connected; the known limitations say what applies today.
The model picker
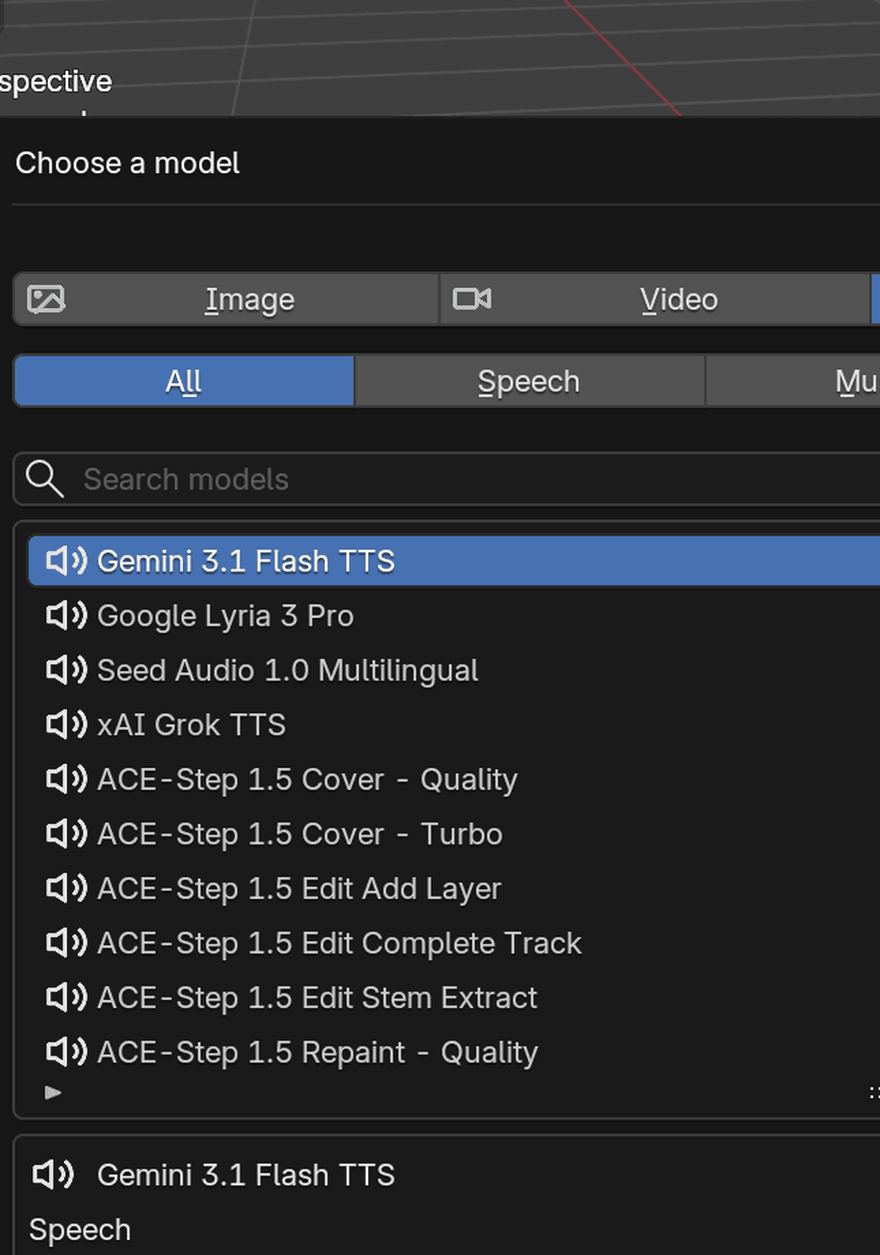
Like Scenario's "Choose a Model", the picker has type tabs, category chips, a search field, a list with thumbnails and a description of the highlighted model. Which models appear depends on your credentials.
| Tab | Categories |
|---|---|
| Image | All, Generate, Edit, Expand, Upscale, Vectorize, Remove Background, Tools, Trained |
| Video | All, Generate, Edit, Lipsync, Upscale, Reframe, Remove Background, Tools |
| Audio | All, Speech, Music, SFX, Tools |
| 3D | All, Generate, Splat, Remesh, Retexture, UV Unwrap, Rigging, Animate, Parts |
Trained lists LoRAs and compositions; see Use a LoRA or composition. Speech-to-text, video-to-text and video-to-motion models are marked Experimental: you can generate with them, but their results aren't fully supported yet (#190).
The floating composer
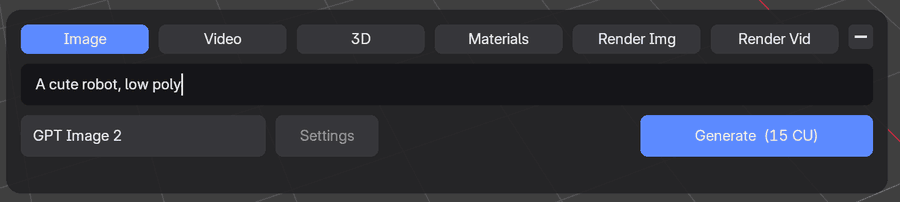
The composer is a pill at the bottom of every 3D viewport with your prompt and a Generate button. It uses the current lane's settings exactly as they are in the sidebar.
Click the pill to expand it. The card has lane tabs (Audio and Blockout stay in the sidebar), the prompt, a model chip that opens the picker, a Settings chip that opens the lane's full form in a dialog, and Generate with its price.
- Environment uses its Generate mode. When the sidebar shows another Environment mode, Audio or Blockout, the composer drives Image.
- 3D Edit: open Settings and select Edit; choose the task in the sidebar or Settings, and select the mesh in the viewport.
- When a model takes no prompt, the field says This model takes no prompt.
Moving and resizing. Drag the pill or the card to move it; it stays inside the viewport and clear of open toolbars and sidebars. Resize the card from its bottom-right corner, and double-click its background to put it back in place. Only the minus button collapses it. Narrow cards shorten the tab labels. When there's no room for the card, the pill opens the Settings dialog instead.
Editing the prompt. Text editing works as usual (selection, double-click, Home/End, Ctrl/Cmd+A, C, X, V). Other Ctrl/Cmd shortcuts and function keys, such as Ctrl+S or F12, still reach Blender; Ctrl/Cmd+Z and Y don't. Enter generates and Esc leaves; while the price is still loading, Enter says so and sends nothing. Clicking outside saves your edit and passes the click to Blender. If the form changes behind your back (for example from another window), your text stays with the old form and nothing is sent until you press Esc or click a lane tab.
Japanese, Chinese or Korean input. The composer can't show input-method composition. Press F2 in the prompt to open Blender's own text field at the pointer, compose there and press Enter to insert the text. Dead keys for accents work directly.
Following your job. After you generate, a thin tray above the card follows your newest job from that scene and tab, including jobs an agent started there. It shows the prompt, the status (Queued, Generating 42%, Ready to apply, Applied), the price and how many other jobs are unfinished. Inspect opens the job's details and actions. A second chip offers the next step, such as Cancel generation, Resume download or Add video strip, and asks for the same confirmation as the sidebar. The cross hides the tray for that job only. Jobs from before a restart, workflows and Film tasks aren't shown there; find them in the Jobs panel. When collapsed, a thin line in the pill shows the job's status and progress.
If the composer keeps failing, it switches itself off: turn it back on with Floating composer in the viewport in the preferences.

Lanes
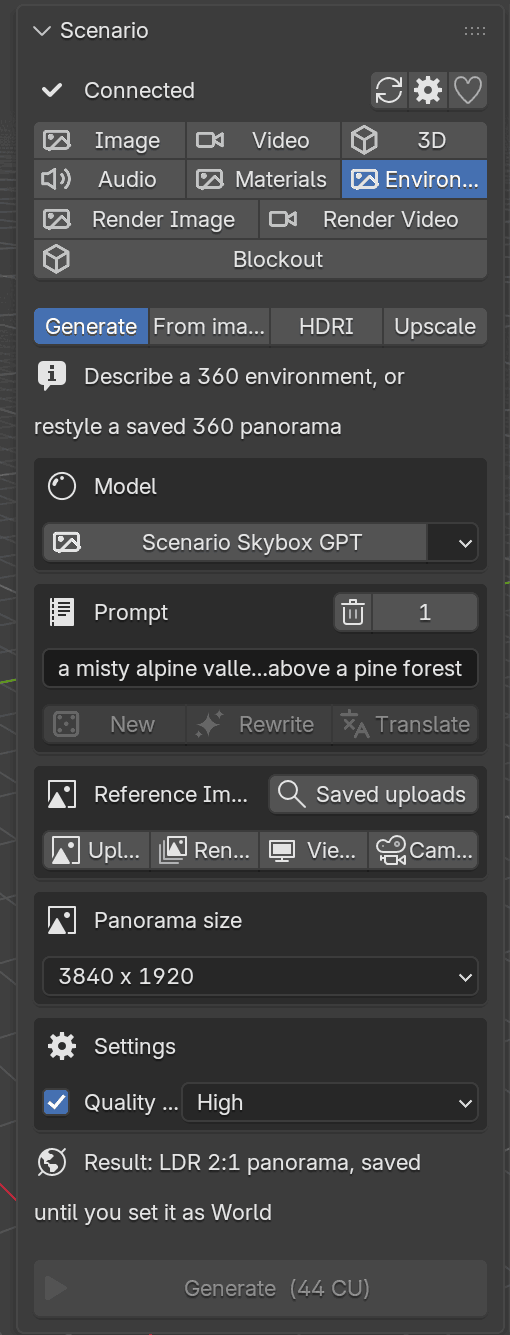
What it does shows every lane's panel side by side.
Image
Choose a model and describe the result. To use a reference, add it to the form, click Upload reference and wait for it to finish; the form then shows a fresh price. Uploading never generates.
The Image form is an offline illustration, not a live model response or price quote.
- While an upload runs, keep the model and slot unchanged, and for a viewport, camera or Render Result snapshot, the scene too; otherwise the late upload won't replace your new choice. A local file keeps uploading while you work.
- Inspect uploads shows progress, cancels an upload that hasn't started sending and cleans up finished ones; your original file is never touched. An interrupted upload can't resume: choose Upload again, then Use this reference.
- To reuse an earlier upload, choose Use saved upload or Saved uploads, then Use this reference, and confirm. Uploads belong to the credentials that made them; editing the original file later doesn't change them.
- The same controls work for audio, video and 3D inputs. Still captures fill image inputs, viewport and camera clips fill video inputs, and Upload selected mesh fills a 3D input.
Supported PNG and OpenEXR results import as packed images, which you can find in Blender's Image Editor. They import into the scene you generated from, edited or not, while it is selected; after Undo, Redo or opening a file they wait in Jobs.
Remove background on an image result fills the Image form with a background-removal model and that image, replacing the form's previous content. It doesn't generate: upload the reference, check the price, then choose Generate.
Use a LoRA or composition
Choose the Image tab's Trained chip in the model picker. It lists the LoRAs and compositions this form can run first, yours before Scenario's public ones. Each row names the base models that can run it, for example LoRA via FLUX.1 Dev; a greyed row says why it can't run in this form.
Highlight a LoRA, choose its base under Run with when several can run it, set its Strength and click OK; if you just typed the strength, the first click only confirms the value, so click OK again. The form switches to that base and adds the LoRA. Strength starts at the LoRA's own value, or 0.75, within the range the base allows. Add more LoRAs the same way to stack them. A composition already combines its LoRAs, so it replaces the form's choice; the picker tells you before OK.
Your choice appears in the Trained models box under Model (in the sidebar, Studio and Render Image). Adjust each LoRA's Strength there, remove one, or choose Add LoRA or composition. A composition's strengths can't be changed. A LoRA without a strength yet shows Set strength: Blender never sends a strength you haven't seen. Each change gets a fresh price, and models that were deleted or became inaccessible are refused before pricing. Choices belong to the credentials and project that made them; choose again after switching.
Reload parameters restores a generation's LoRAs or composition when they are still available, and says how many it couldn't restore. The Model button and the composer's model chip show the choice as FLUX.1 Dev · Studio LoRA (+1).
Project defaults for LoRAs
At the end of the Trained models box, Save makes the current choice this form's default for your credentials and Project ID, Use brings it back, and Clear forgets it. A form without a chosen model, such as in a new file, picks up the default by itself. If the default can no longer run, the form says Project default ... is unavailable and won't price until you choose a model or clear it; it never falls back to the base model alone. Defaults of other credentials or projects are never used.
Trained models are experimental: the picker shows Experimental: LoRAs and compositions in testing, and the Trained models box shows Experimental: in testing. They run, but results with them haven't been fully verified. Training stays in Scenario's web app.
Video
Text, images or your Blender scene to video, with Seedance, Kling, Veo, Wan, LTX and other video models, including audio-to-video.
Using your scene. Add a Viewport clip or Camera clip reference and choose Upload reference. Blender records a silent MP4 over the preview range, or the scene range, and restores your settings afterwards. Captures are 1280 pixels on the long side and keep the shape of the camera's render frame or of the viewport. Grey clay capture replaces viewport shading. The uploaded clip is fixed: it isn't trimmed or padded, and later timeline changes don't affect it, so set the range first. Match timeline helps set the model's duration, but check the model's own limits.
Playing a result. Play video (N) opens a private copy in your system player, and Play in Blender (N) opens one in Blender's animation player (at most two at a time; whether it plays the soundtrack hasn't been verified). Neither player gets your credentials, and both work offline.
Adding it to the sequencer. Add video strip (N) asks you to confirm the scene and current frame, then places the video (MP4 or WebM, up to 512 MiB) on a free channel without generating again. The strip leaves out embedded audio and plays at the scene's frame rate. If the scene or frame changes first, confirm again. If the Sequencer shows another scene, select this one in its header. The strip plays a local copy kept by the extension, which must stay available if you move or share the file. To show it behind the scene instead, see Camera backgrounds and image planes.
Results from the earlier prototype offer Play, Play in Blender and Add video strip instead.
3D
Four modes: Text, Image, Multi-view (several views of one object, front first) and Edit (Scenario's 3D tools on your selected mesh). Models include Meshy, Rodin, Tripo and Hunyuan, plus worlds such as Marble, HY World and TripoSplat. Text and Image modes start with Tripo P2 at real-world size (Auto Size) and 50,000 faces; change either in the form.
Importing a model. Choose Import <format> model (N), such as
Import GLB model (1), for the main model, or Import alternate: <format> (N)
for another file the provider returned. When a model also returns its GLB as an OBJ
with an MTL and texture maps, only the GLB downloads with the job. Choosing
Import alternate: OBJ, Apply alternate mesh edit: OBJ or Apply saved material
downloads the files it needs first; choose it again when the download finishes. This
needs Online Access, and Stop download stops it. The review shows the scene, cursor
position and files, for example OBJ + MTL + 2 maps. Once confirmed, the model arrives
as a new group at the cursor with its materials and textures packed; your
objects and selection are untouched. Check Longest side to scale the new
group evenly to that length, with its bottom still at the cursor. For an Edit
job whose mesh is still in the scene, Match
- Supported: GLB, glTF, FBX, OBJ and mesh PLY, up to 256 MiB per file. Large files may pause Blender briefly.
- Rigs, skin weights, shape keys and animation clips are kept. Your timeline range doesn't change, so extend it to play a full clip.
- If a file changed or isn't supported, the job says Nothing was imported and nothing changes.
- With Global Undo on, one Undo removes the import and Redo restores it. Neither changes the job or refunds it. Save the blend file yourself.
See model import for format details and limits.
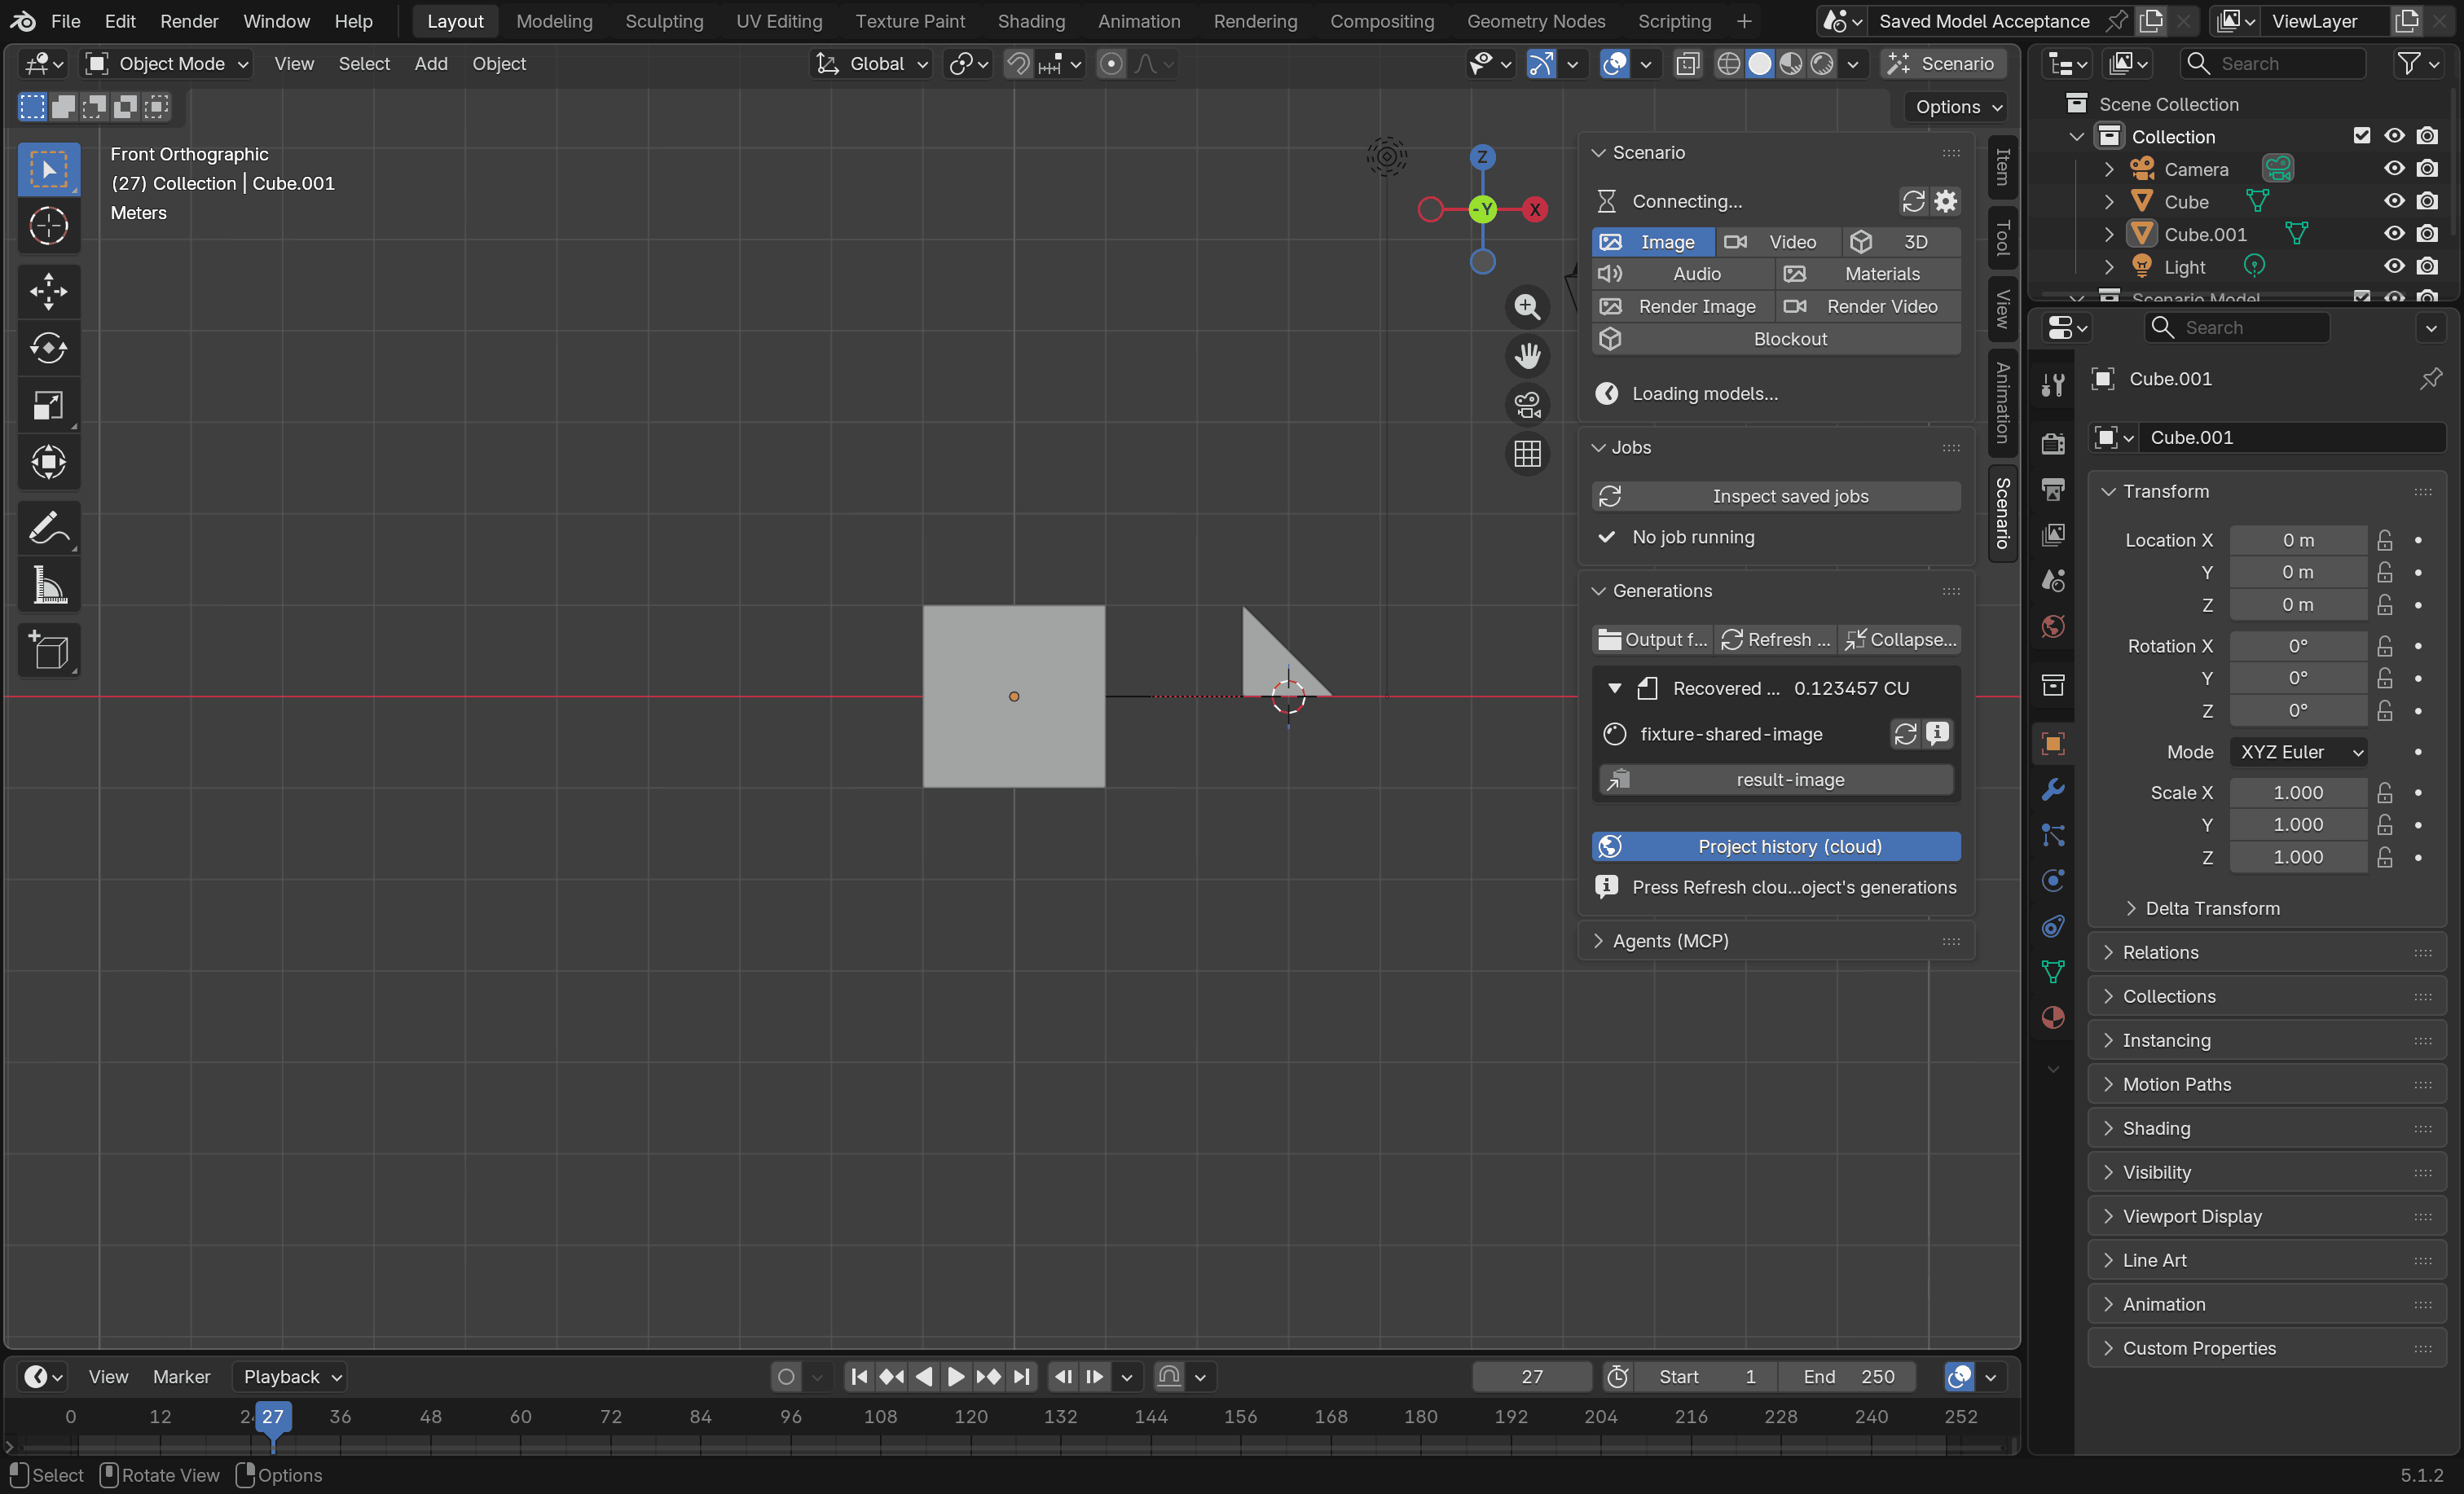
Gaussian splat worlds. Worlds come back as Gaussian splats, which Blender can't render, so they import as a coloured point cloud (view it in Material Preview or Rendered mode). The review lets you limit the number of points (1,000,000 by default) and choose how the file stores "up". If the world arrives upside down, delete it and import again with the other axes. The Scenario Splat Points modifier controls point size. SPZ version 4 files can't be read yet. Splats import one file at a time and wait while a Render capture or Film preparation runs; import again once it finishes. See splat import for details.
Edit mode:
- Select the mesh in the viewport.
- Pick the task: Remesh, Retexture, UV Unwrap, Rigging, Animate or Parts.
- Choose Upload selected mesh to send a snapshot of it (modifiers applied, materials embedded), then review the price and choose Generate. Later edits don't change the snapshot; remove the reference and upload again to replace it.
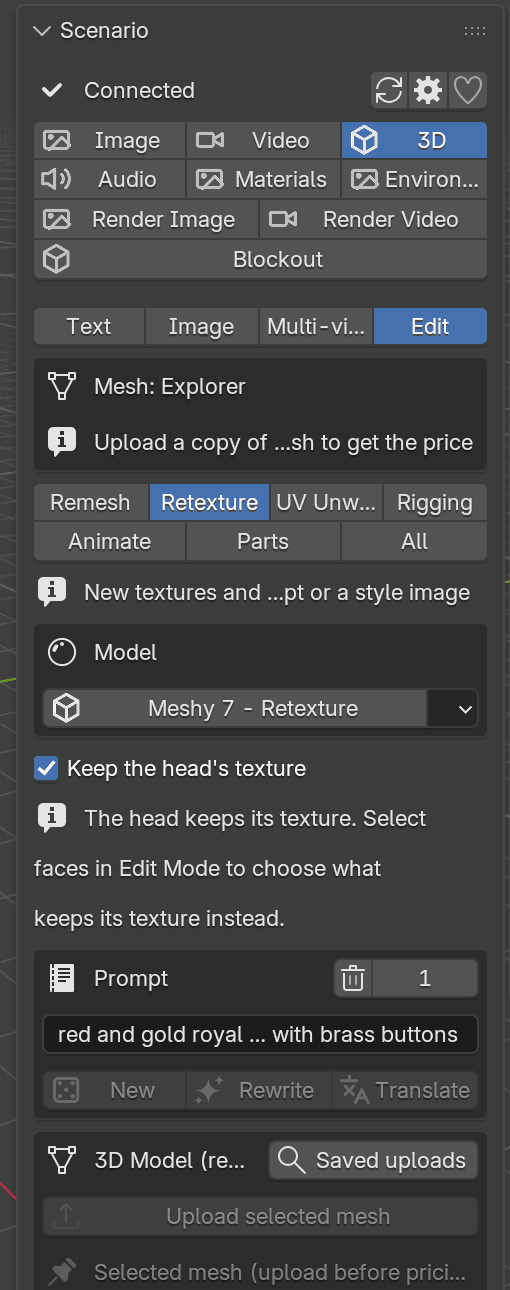
Retexture starts on Meshy 7 Retexture, which repaints the whole surface in about a minute on your mesh's own UVs, with normal, roughness and metallic maps. When you apply it to your mesh, the faces you selected in Edit Mode keep their own texture. With no faces selected, a standing character keeps its head, so its face stays as it was; turn off Keep the head's texture, under the model, to repaint the head too. Claude Opus 5.5 3D and GPT-6 Astra 3D, next in the list, repaint only what your prompt names and keep the rest themselves, but take 10 to 16 minutes on a typical character; the form shows the expected wait.
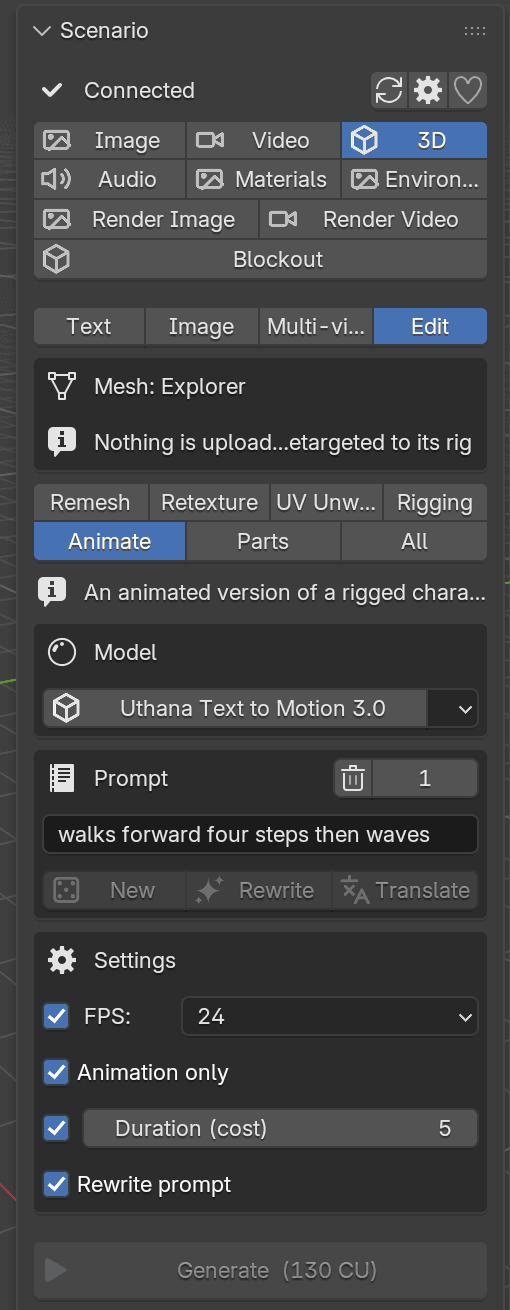
Animate starts with text-to-motion models, Uthana Text to Motion 3.0 and Viggle Text to Motion: describe the motion, such as "walks forward four steps then waves", and generate. They upload nothing and need a mesh that already has a rig (use Rigging first); Apply animation then moves your rig with the motion, including its walk across the floor. Their duration starts at your scene's length once you have set a frame range, and Uthana's frame rate at your scene's when it offers it (24, 30 or 60 fps), until you change them; Uthana also starts on Animation only, since your own character plays the motion. Meshy Animation instead plays a motion from Meshy's library on your uploaded character: pick it by name (Walk, Run, Wave hello, Jump and others), or choose Other ID and type any ID from Meshy's animation library. Cartwheel Text to Motion also animates your uploaded character from a prompt; it is listed here, not in Text mode.
A mesh too dense to take edits in place shows its triangle count and suggests remeshing it first; its results still import as new objects. Apply animation still works on a rigged mesh that dense, since it changes only the rig.
To put the result back on your mesh, see Apply a saved mesh edit.
Materials
The Materials tab lists Scenario's texture models, PATINA first. Patina turns a prompt or photo into a seamless PBR set: base color, normal, roughness, metalness and height. PATINA Material works from a prompt, PATINA Image to Maps from a flat texture or photo, and PATINA Material Extract isolates one material from a photo. Scenario Texture and the other texture models make one seamless texture that applies as base color.
Describe the material, choose the maps and size, and generate. The texture set is saved without touching your scene.
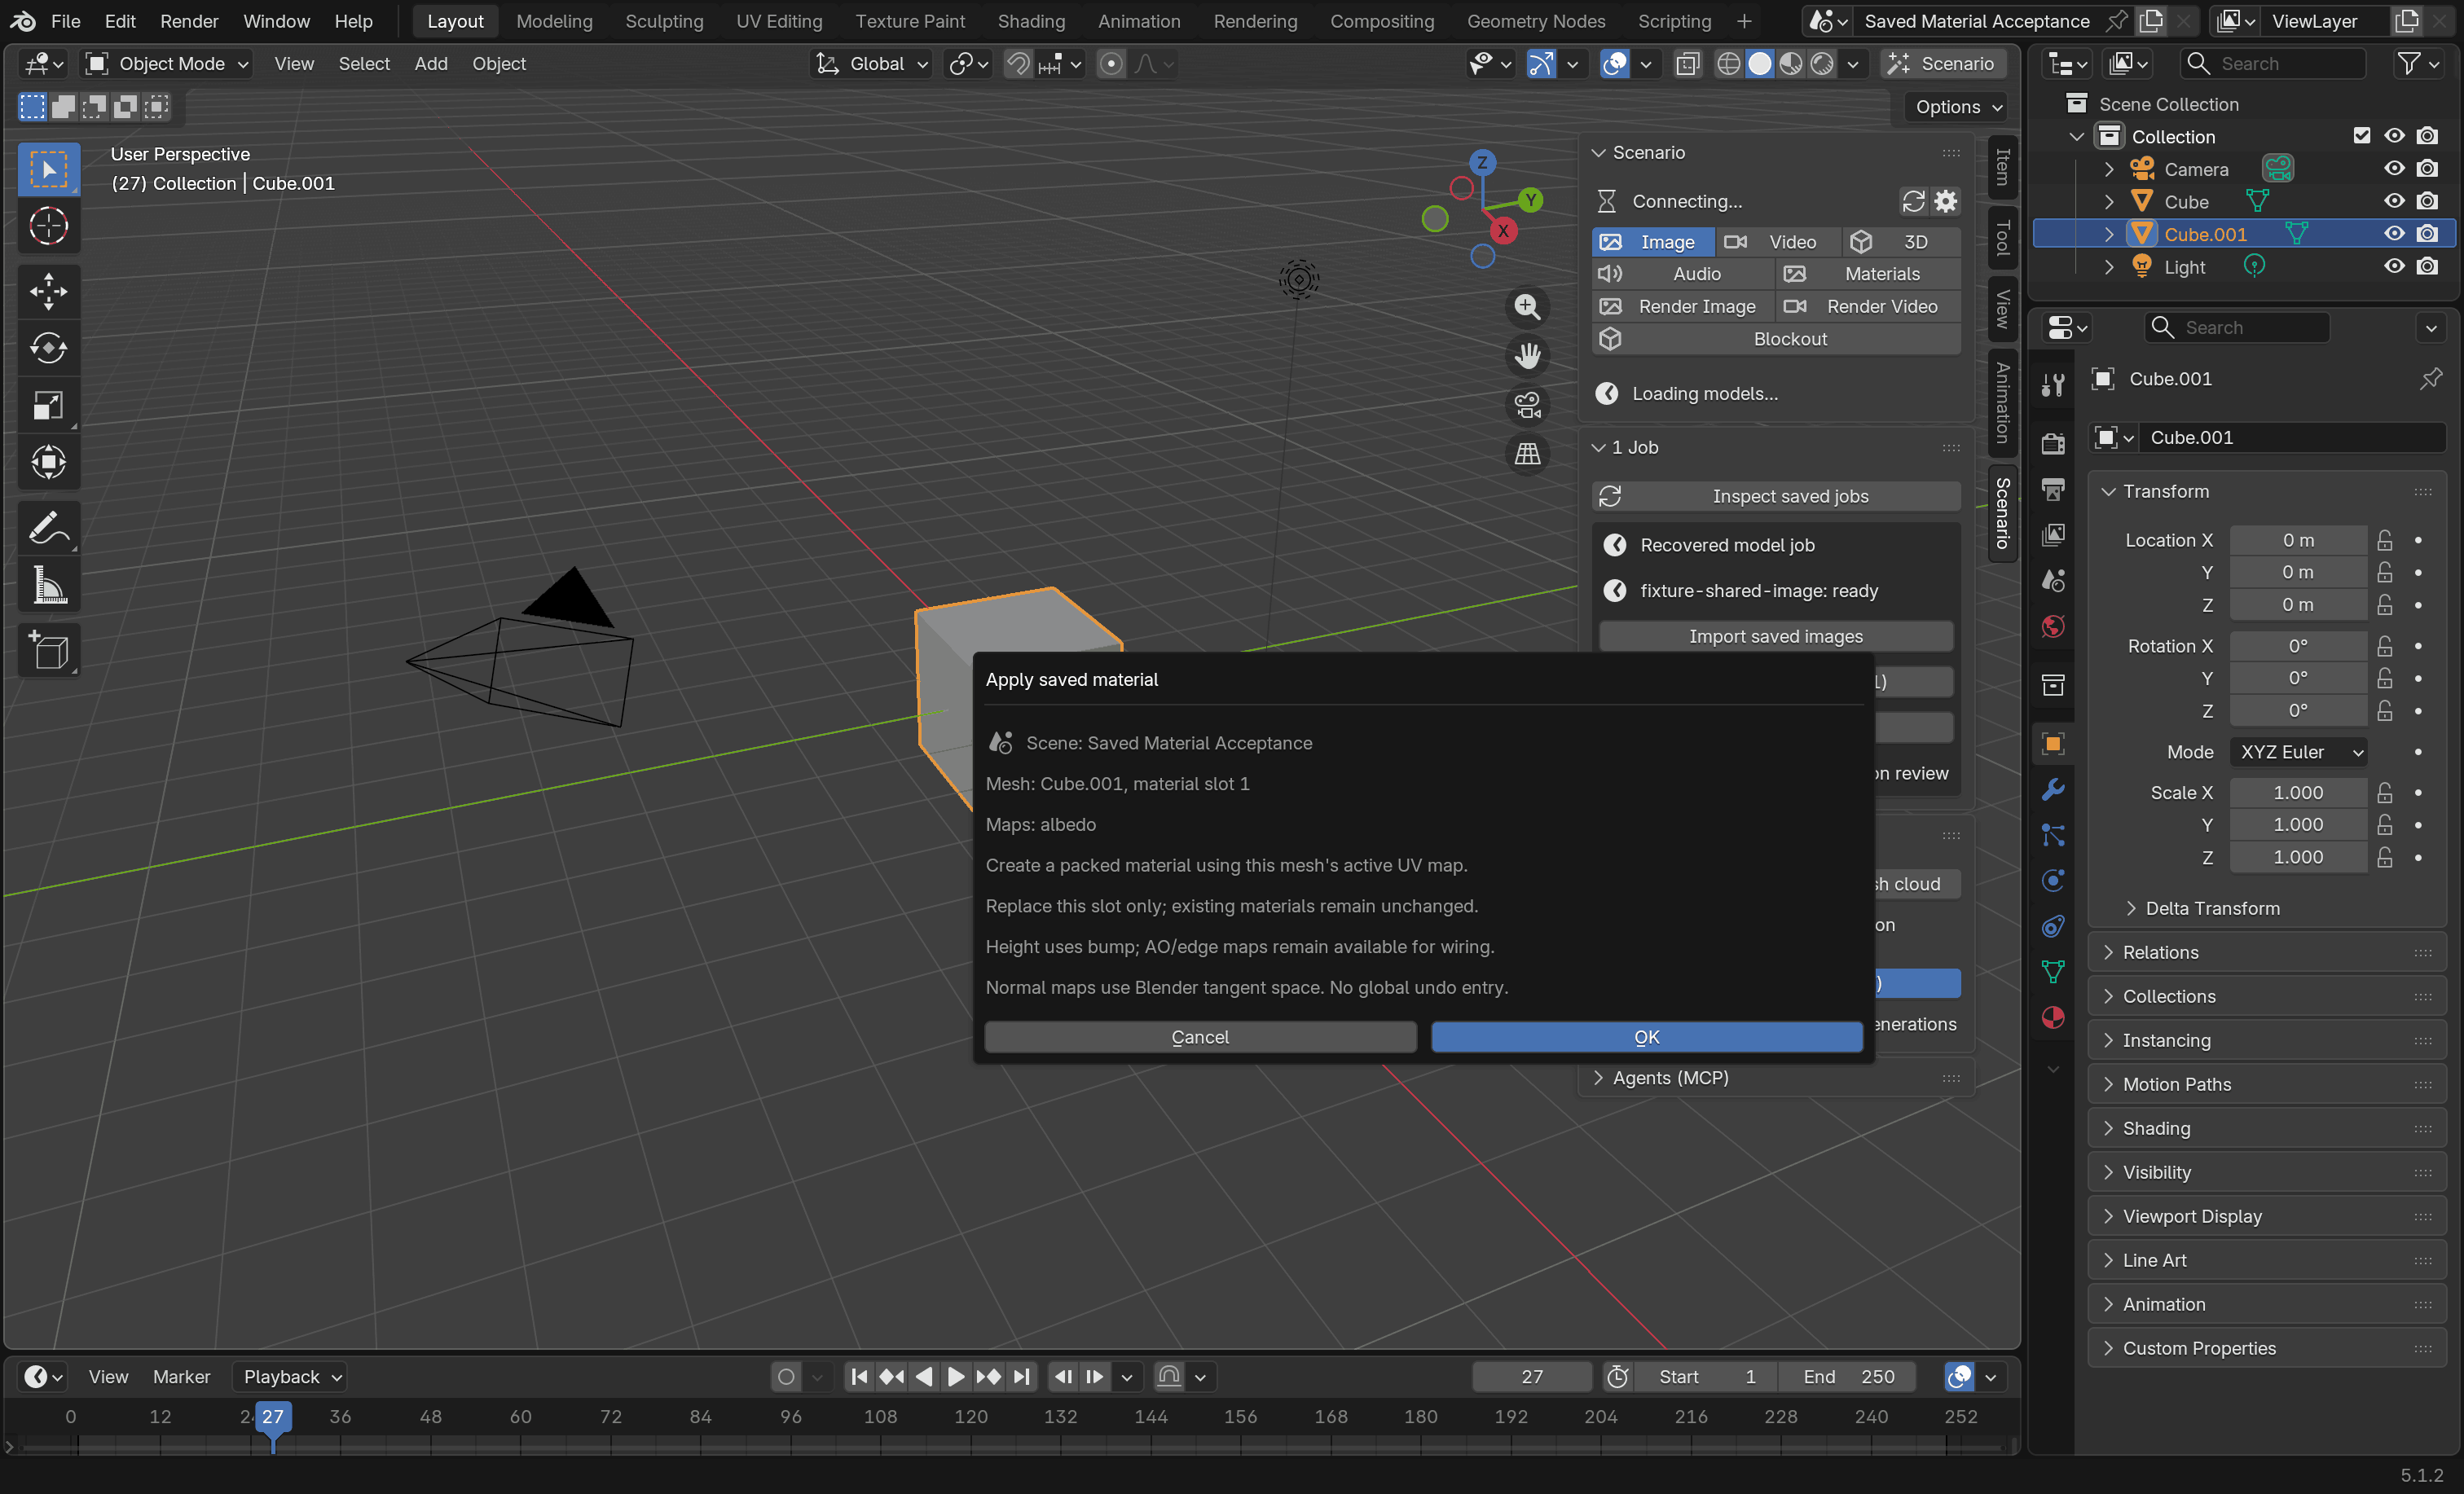
To apply it, select a mesh and choose Apply saved material on the job. Confirm the mesh, material slot, maps and Tile size, the length one texture repeat covers (2 m by default). A mesh without UVs is mapped by box projection and keeps its geometry. Only that slot changes; nothing is regenerated or spent. Height is wired as bump, and AO and edge maps are kept for you to connect by hand. Undo doesn't cover this, so keep any material you want to restore and save the blend file yourself. See material application for details.
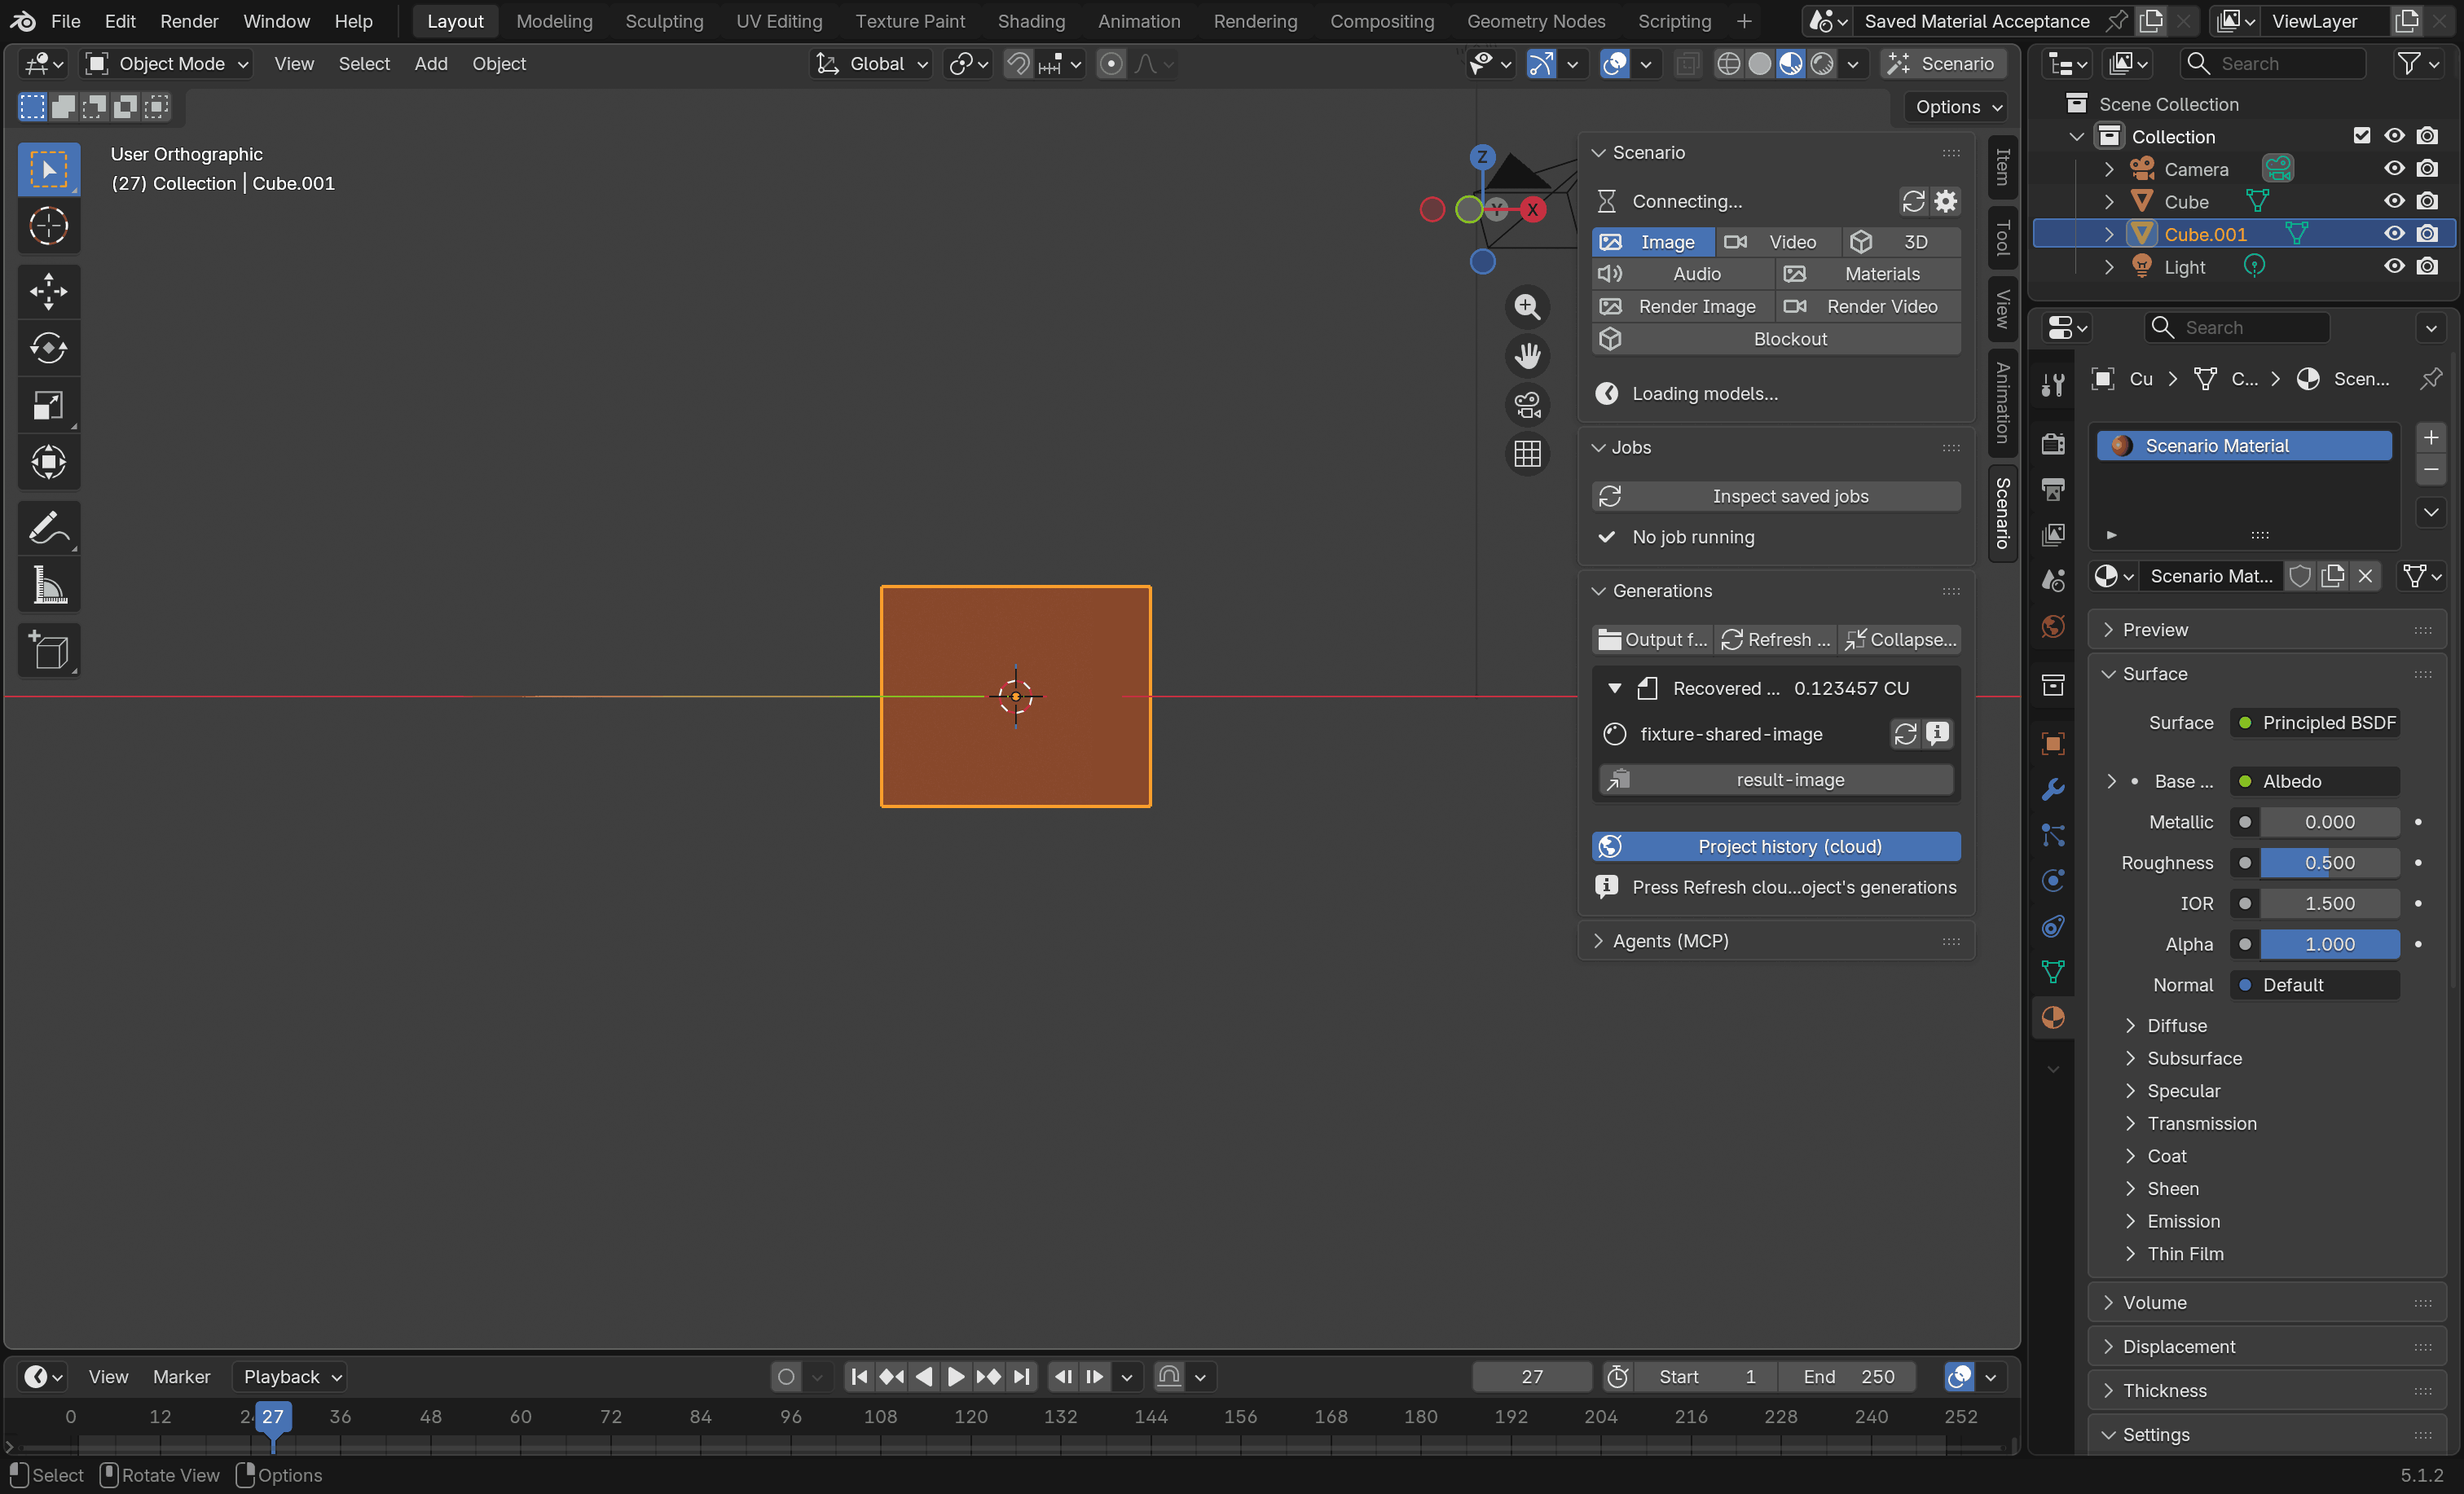
Audio
Speech, music and sound effects with ElevenLabs, Google Lyria, ACE-Step, Minimax, Gemini TTS, Sonilo and other audio models. When a model makes WAV audio, you get that WAV file, not Scenario's compressed MP3 copy. A music model's duration starts at your scene's length, from its frame range and frame rate, until you change it.
Add audio strip (N) places a saved MP3, WAV or OGG result on a free sequencer channel at the frame you confirm, as for video.
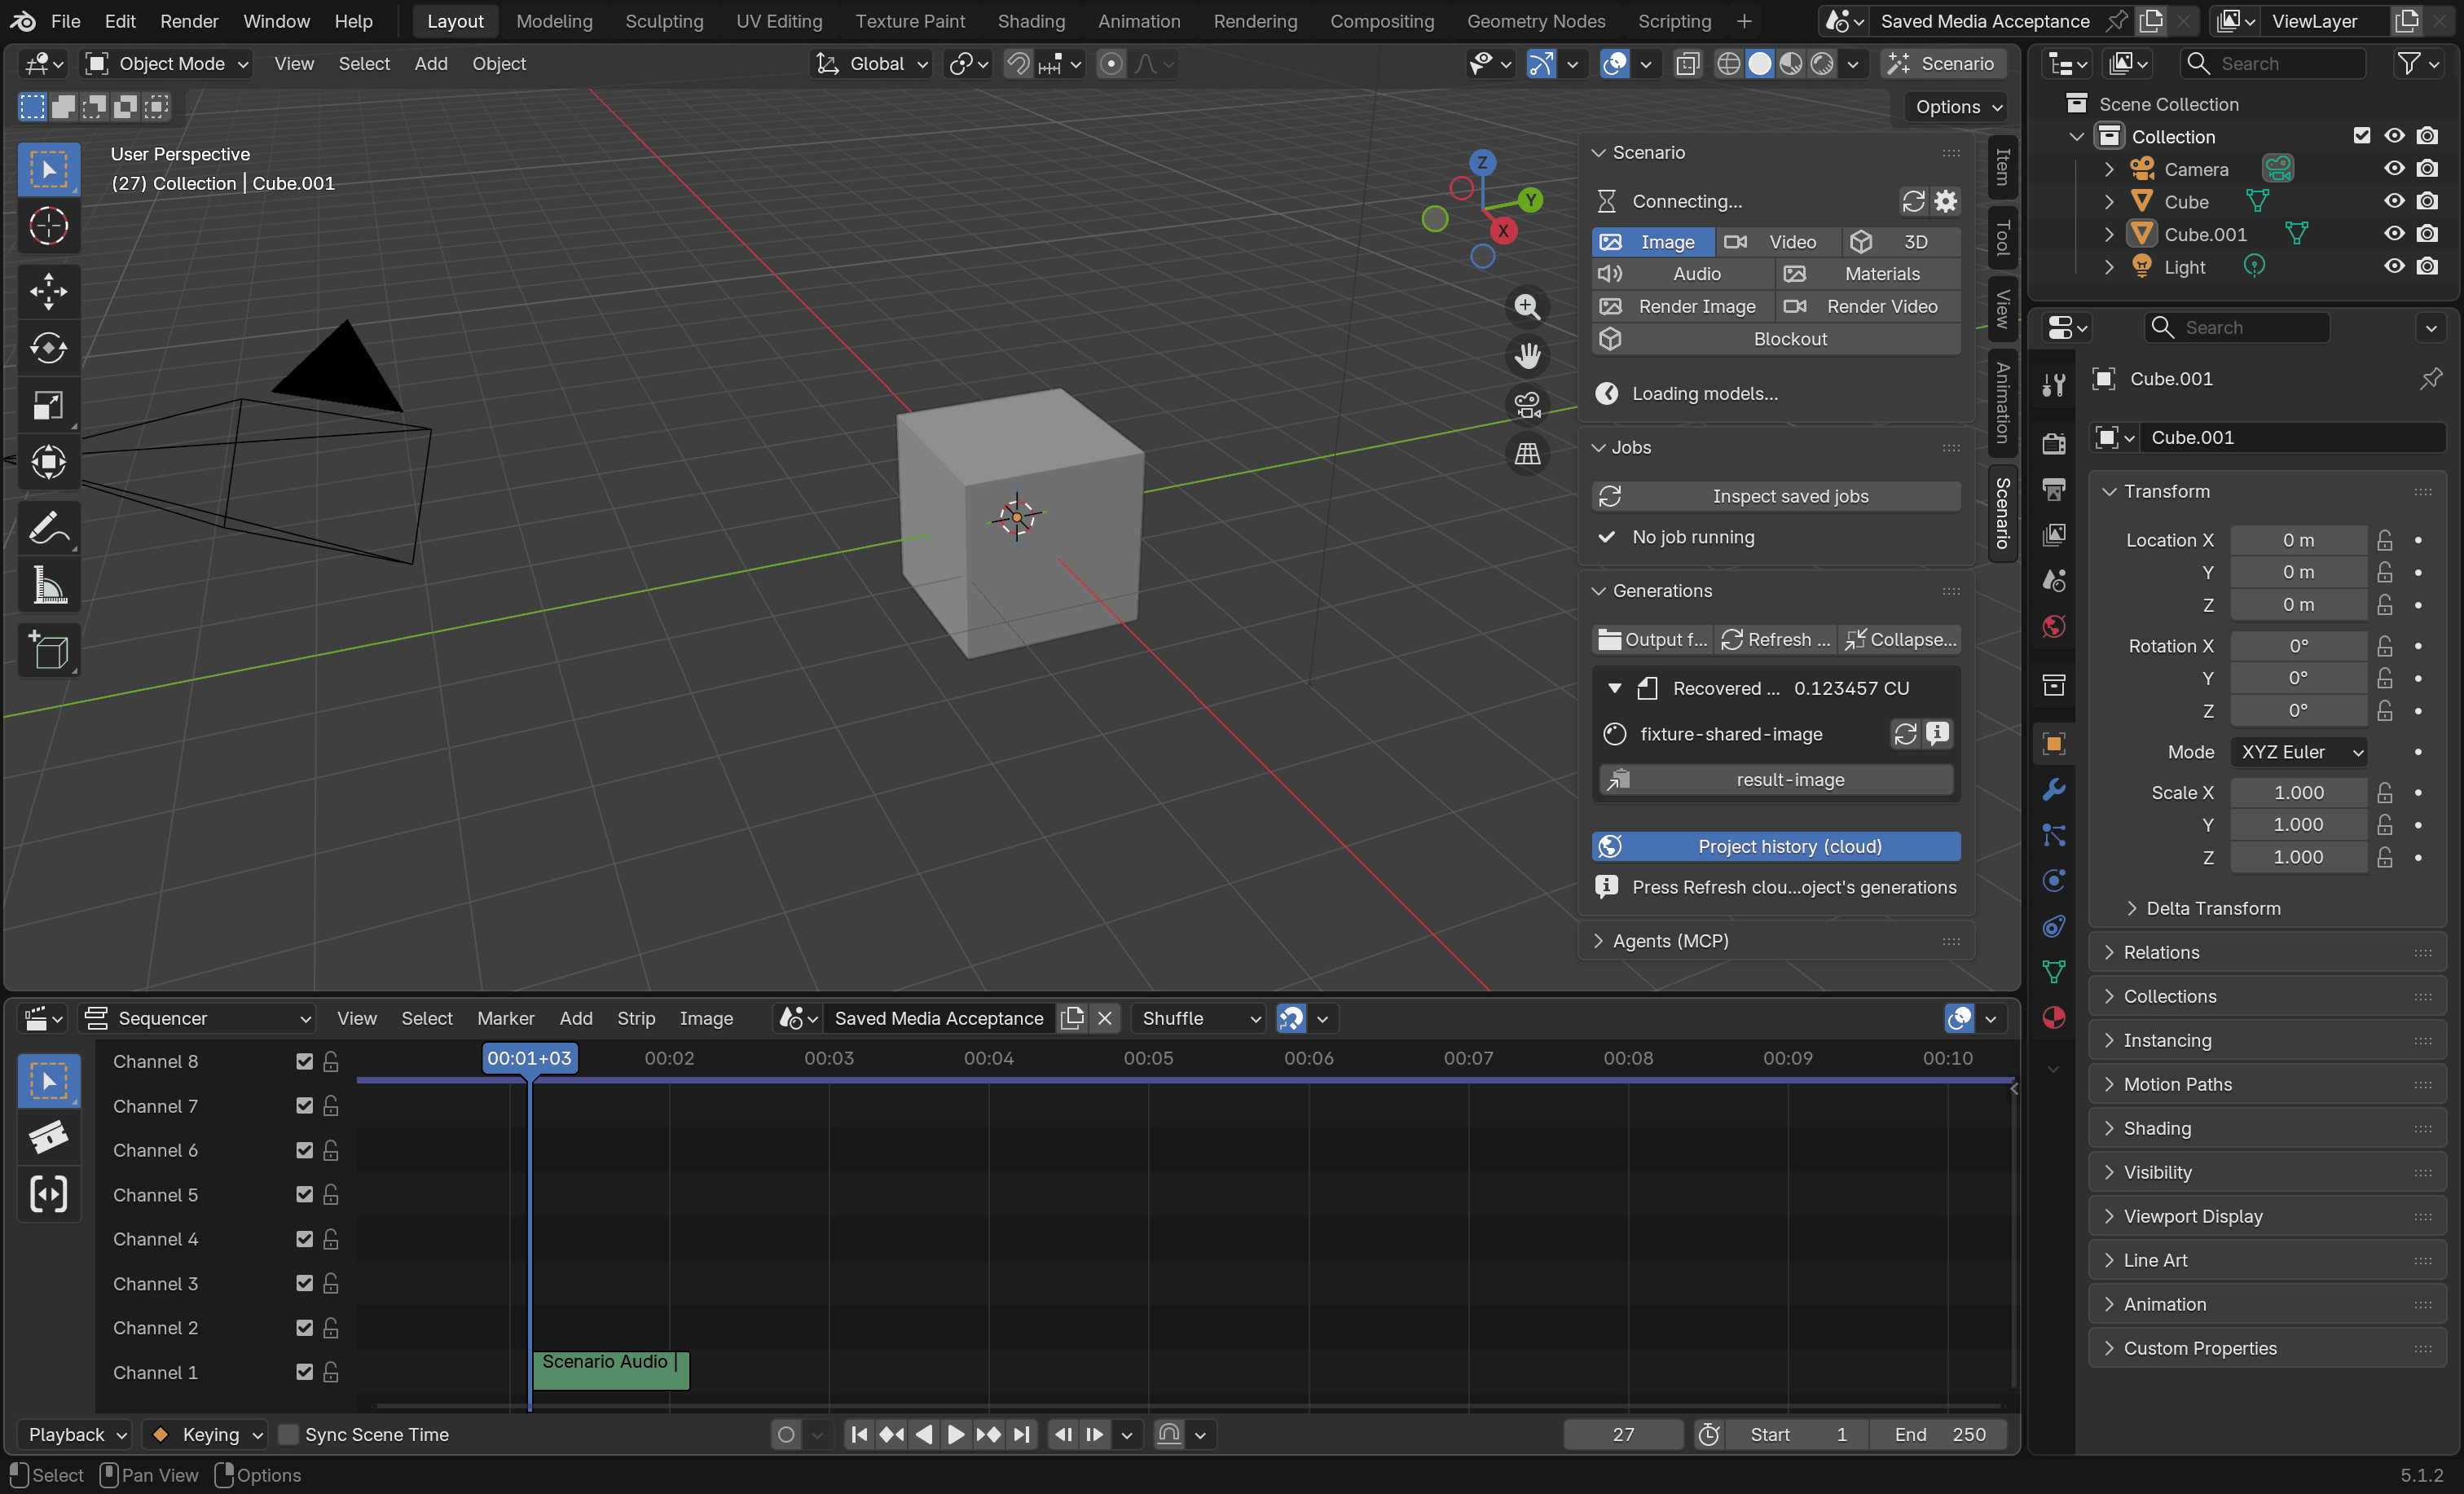
Play audio (N) plays the audio inside Blender, up to ten minutes long, through the output chosen in Preferences > System > Sound, even offline. While it plays, the button reads Stop audio (N); playing another result stops the first. Open in system player (N) opens a private copy in your system player instead. Waveform (N) draws the audio under the job's controls without playing it, even offline, with its duration, channels and sample rate. Waveforms support common audio formats up to ten minutes; see waveform limits.
Render Image
Your view, rendered as a finished still by an image-editing model. The Rendering Style section holds everything that shapes the look.
- Scene to render: choose Viewport or Scene camera (optionally with Grey clay capture), then Capture and upload scene. The still keeps the shape of the camera's render frame or of the viewport, at the size shown. The price appears on Generate when the upload finishes; nothing is sent until you press it. Capture again replaces an uploaded capture after you move the camera. The floating composer has the same button, Capture.
- Model: GPT Image 2.5 Sunburst by default, or any other image-to-image model.
- Look: describe the result, for example "weathered steampunk copper, overcast light". Left empty, Prepare look with Prompt Spark (on by default) writes one, with its own price and approval before the render's; turn it off for a photoreal default.
- Style images: optional references for palette, materials and lighting. The capture is always image 1.
The model is told to keep your scene exactly (objects, positions, camera and framing) and to use style images only for their look. Results are saved for you to apply; to start a clip from one, use Use as video first frame (Render Video). Agents can prepare the same form through local MCP; see the agent preparation sequence.
Render Video
A playblast of your timeline, rendered as a finished clip by a video model that takes a reference video. The look, reference frames and first frame are in the Rendering Style section.
- Clip to render: choose Viewport or Scene camera, build a camera path if you want one, then Capture and upload scene. The silent clip covers the range shown, without padding or trimming, at the size shown, and a chosen first frame uploads with it. Match timeline sets the model's duration; it doesn't change a clip already uploaded.
- Model: Seedance, Minimax, Runway Aleph, Gemini, Grok and other video-to-video models.
- Look and Reference frames: as the look and style images in Render Image. Prompt Spark needs a first frame.
Camera path
Type the shot you want ("slow ellipse 2, 8 s, 35mm, hold 2 s") and press Plan
to place Shot markers and build the path in one step. Or pick a move from the
library (orbits, ellipses, dolly and truck, crane and arcs, pans and flyovers),
choose Place markers, move or fine-tune the numbered markers and set a hold on
any of them, then Build camera path. Either way, Blender animates
Scenario Shot Camera and asks before replacing an existing path. With Match
timeline on, the model's duration sets the path's. The play button previews it,
and Clear path removes the camera and markers. A Camera clip then records
exactly that move.
First frame
Choose an image: Capture and upload scene uploads it with the clip, or Upload first frame uploads it alone. To use a generated image instead, choose Use as video first frame (N) on a PNG, JPEG or WebP result (first in the list on Render Image results, and Use as first frame on the composer's job strip): it reuses the image on Scenario without uploading or generating, and the slot shows From a saved result (remove it to undo). Some models (Seedance 2.5, 2.0 Fast and 2.0 Mini, Minimax H3 and Wan 3.0) can't take a first frame together with the clip; for them, the image guides the opening look instead, and the form says so.
Blockout
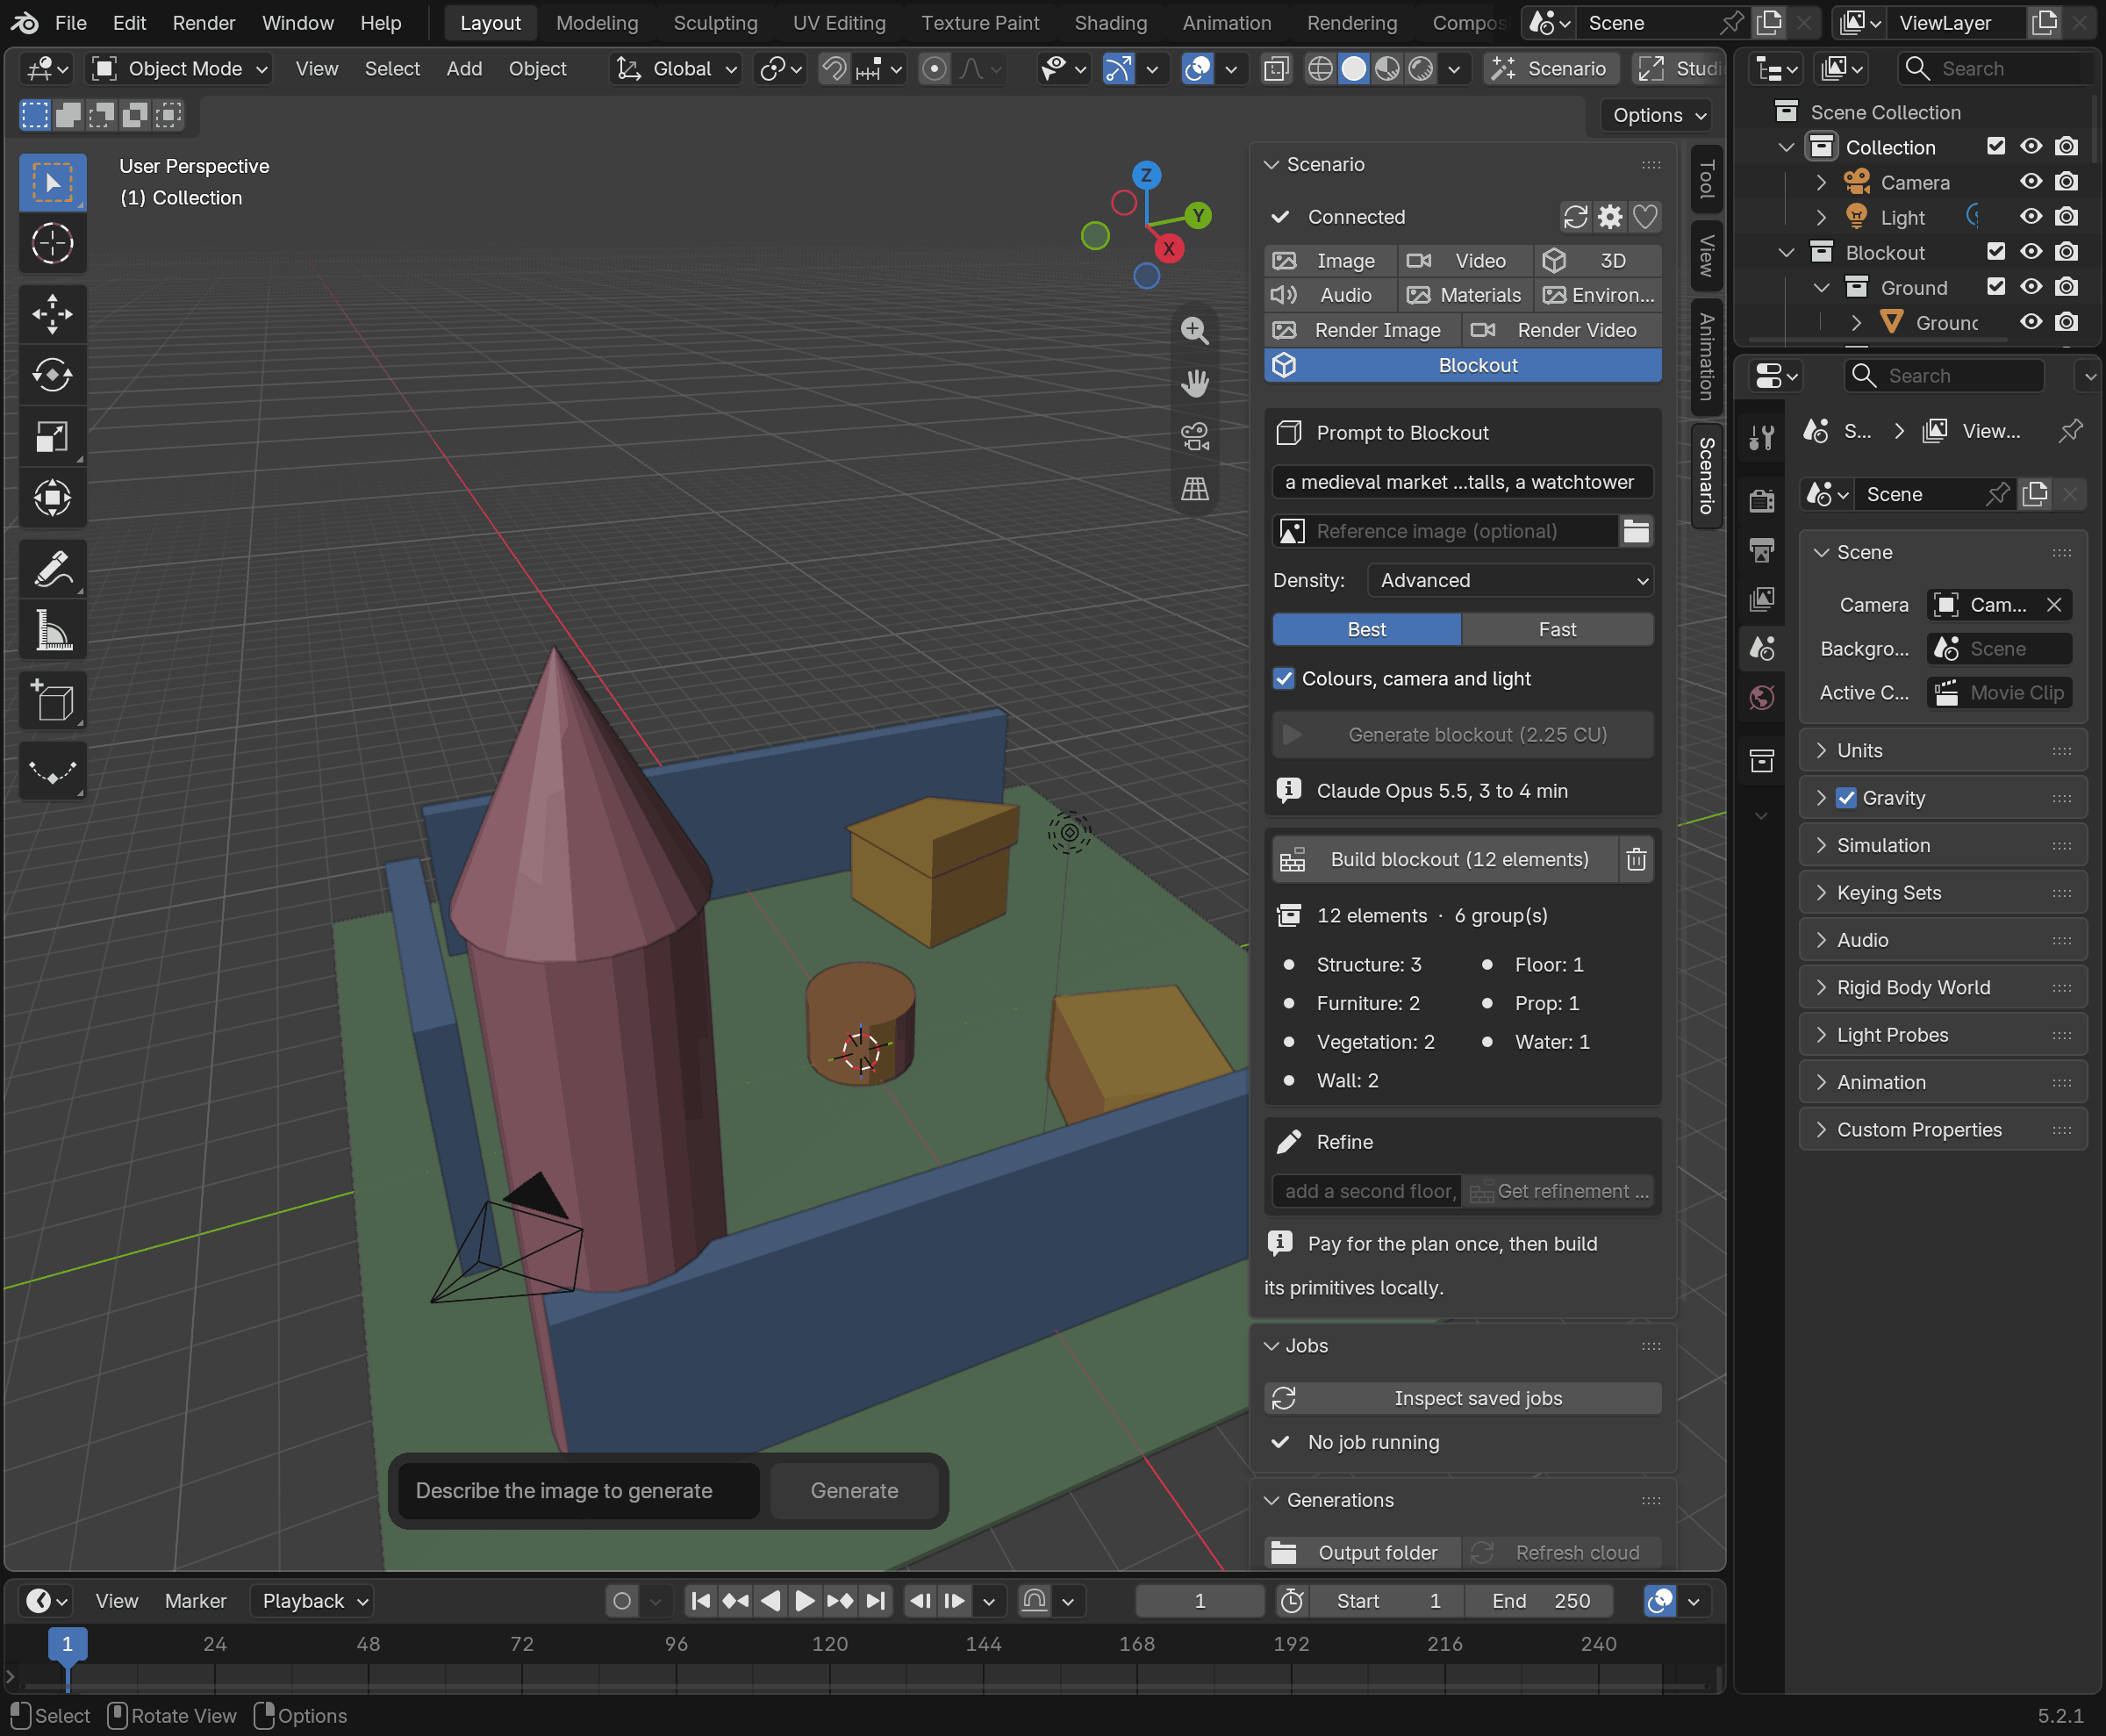
The layout is a sample plan built locally for this screenshot, not a model response; the price is an example.
Turn a scene description or a reference picture into a greybox layout of
coloured primitives, grouped in a Blockout collection.
- Describe the scene. To follow a picture or concept, choose a Reference image and press Upload; the description is then optional.
- Choose a Density (Simple, Medium, Advanced or Expert: more primitives and finer detail) and a model: Best (Claude Opus, the richest plans: 3 to 4 minutes, 1 to 2 for a refinement) or Fast (Gemini Flash, a rougher plan in under a minute, cheaper). Colours, camera and light is on by default.
- The price appears on Generate blockout; choose it to pay once and design the plan, which Jobs lists until it arrives. New plan prices another one from the same fields. Changing the fields, scene or credentials first cancels the approval.
- Choose Build blockout to create the geometry. To refine, describe the change, choose Get refinement price, approve it, then build again.
- Clear removes the collection and plan after asking. Build and Clear support Undo.
Each group has its own colour and a shared material. With Colours, camera and light on, a build also adds a camera that frames the whole blockout and one sun light when the scene has none; your own cameras and lights are never moved, and Undo reverts all of it. With it off, colours mark categories such as Floor, Wall, Prop, Furniture and Vegetation. Swap blocks for generated 3D assets as your scene develops. Rebuilding replaces only this scene's Blockout collection (the camera and light stay), and manual edits to its objects are lost. Move any objects you added to that collection elsewhere first: they block rebuilding and clearing.
If a request's outcome is uncertain, don't generate again: select the scene, choose Inspect saved jobs, Read saved Blockout plan, then Use saved Blockout plan, and confirm. This updates only the stored plan (Undo reverts it); choose Build blockout to update the geometry.
Environment
Generate a 360 panorama for the scene World. Modes:
- Generate: from a prompt, with Scenario Skybox GPT (3840 x 1920 by default) or Flux.
- From image: from one image of a place, with HY World.
- HDRI: convert a saved panorama or a local 2:1 image into an HDR OpenEXR environment.
- Upscale: upscale a saved panorama or a local 2:1 image. To stay within the 32-megapixel World limit, a saved panorama upscales 2x at most, and an upscaled one can't be upscaled again.
Panorama inputs take a Saved panorama (a downloaded result Scenario marks as 360) or a local 2:1 PNG or JPEG, which Upload reference checks before sending. Results stay saved until you apply them. Set panorama as World (N) applies one, and Make HDRI (N) opens the HDRI form with it. Review seams and lighting yourself: the extension doesn't measure them, and HY World hasn't been checked with a live run yet (#494).
Jobs and results
Every generation is saved as a job, so you can follow it, recover it after a restart and apply its results when you're ready. Image lane results import by themselves in the session that sent them; nothing else reaches your scene until you confirm where it goes. If a submission's outcome is uncertain, never send it again: inspect the saved job first.
Jobs
The Jobs panel lists what's running, with statuses such as "queued", "generating", "finished on Scenario", "downloading results" and "results saved". A job stays here until you apply its results.
- This session: N CU across N jobs adds up the exact prices of the jobs Scenario accepted from this Blender, agents' included, since you opened it or changed credentials or project. A submission with an unconfirmed outcome counts only once linked. It sums prices, not your bill.
- A progress bar appears when Scenario reports progress; some models don't.
- With Online Access off, checking and downloading pause; the job continues on Scenario.
- If Scenario can't be reached for a moment, the job shows "Status not refreshed; retrying" and keeps checking, waiting a little longer each time. After about four minutes without an answer it stops and asks you to choose Resume download once Scenario is reachable again.
- If a cancel request doesn't go through, the job says so and keeps checking its status. The cancel is never sent twice.
- A download that fails is tried again automatically, up to three times in all. If it still fails, use Resume download; a large download never holds up checking other jobs.
- Stop download stops a download in progress without keeping a partial file. Resume download starts it again later.
- After a restart or opening a file, saved jobs show again in the Jobs panel, also while Online Access is off; nothing is sent to Scenario to list them. Choose Refresh status or Resume download. They keep their result tools, such as Use as reference on an image whose saved file is unchanged. Prompts aren't saved, so such a job shows its model's name and offers no Reload parameters.
- Cancel prepared job drops an approved request that hasn't been sent yet; nothing reaches Scenario. A canceled Film task keeps its name, so use a new take name to retry.
- Cancel generation appears only for jobs Scenario can cancel. Other running jobs finish or fail on Scenario and stay recoverable.
- While a request's outcome is unconfirmed, the same request is refused so you aren't charged twice. Blender looks in your recent Scenario history for jobs that could be it. If you recognize one, choose Choose cloud job..., pick it and choose Link this job: Blender checks it with Scenario and then follows it like any other job. Find in cloud history looks again. If it isn't there, choose Mark reviewed; this lasts until you restart Blender.
- After a restart, a finished prompt helper job offers Read prompt text, then Copy prompt text.
Generations
The Generations panel shows this session's results, then, with Project history (cloud) on, your project's history from the web app, agents and other machines. Load older goes back in time, up to 30 days.
Each entry shows the prompt, price, model, asset ID (click to copy), a thumbnail and the actions for its kind:
| Result | Actions |
|---|---|
| Image, Render Image, Environment | View image, Use as reference, Remove background, Apply as texture, Add image plane, Set as camera background |
| 3D | Add to scene, Select, Delete |
| Video | Play, Play in Blender, Add video strip, Set as camera background |
| Audio | Play audio, Waveform, Open in system player, Add strip |
- Reload parameters puts the lane, model, prompt, settings and references back into the form.
- Details shows everything that was sent and returned.
- Use as reference on an image this session saved reuses its Scenario asset when the file still matches, so nothing is uploaded again.
- Select and Delete find the objects a generation created, even after renames.
Grid shows the results as preview tiles, twelve at a time; List brings the rows back. Choose a tile to see its preview large with the prompt, model, kind, file size, submission time and price, and the same actions; the arrows move to the next result and All results goes back. The sidebar starts on the list, Studio > Results on the grid.
When a generation fails, a red marker shows the reason Scenario gave, including the
error ID (error_...) support asks for; Copy error in Details copies it. The
reason isn't saved, so after a restart only the marker remains.
This session's results show the price you approved. In cloud history, prices include add-on fees such as quality checks, and a workflow shows the total of its steps, or Cost unavailable if one can't be read; its steps are listed too, so don't add them up again.
Saved jobs. Inspect saved jobs lets you resume downloads and apply results, even after a restart. Opening a saved job never generates again or imports by itself.
Recovering a cloud job. Save for recovery brings a completed cloud model job into your saved history without downloading or changing anything; a failed read never causes another paid generation. Then use Inspect saved jobs to download and apply it. This can't restore the target mesh of an edit made in another session.
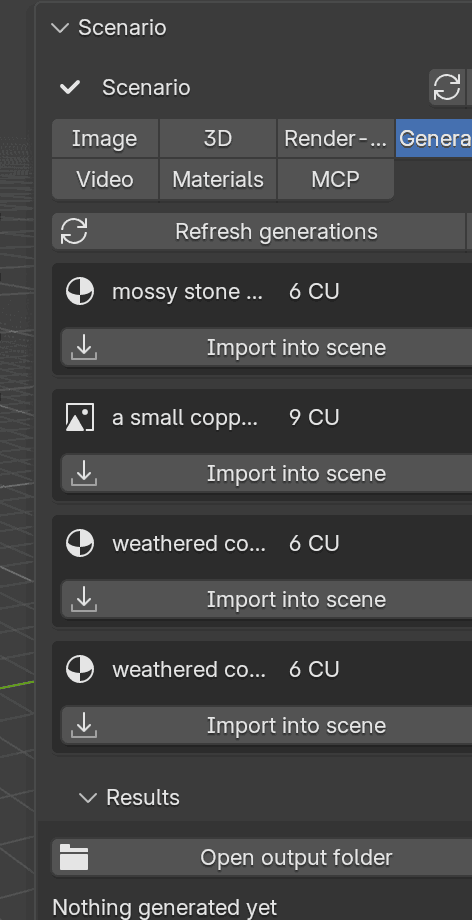
Result previews
Saved jobs show previews of their results, four at a time: Scenario's preview image
for video, audio and 3D, and a small copy of the file for images. Scenario can take
a few minutes to prepare one; if it doesn't arrive, choose Retry preview (N).
Previews never cost anything or change your scene. Agents read them with the local
MCP inspect_result_previews tool.
Reuse saved results
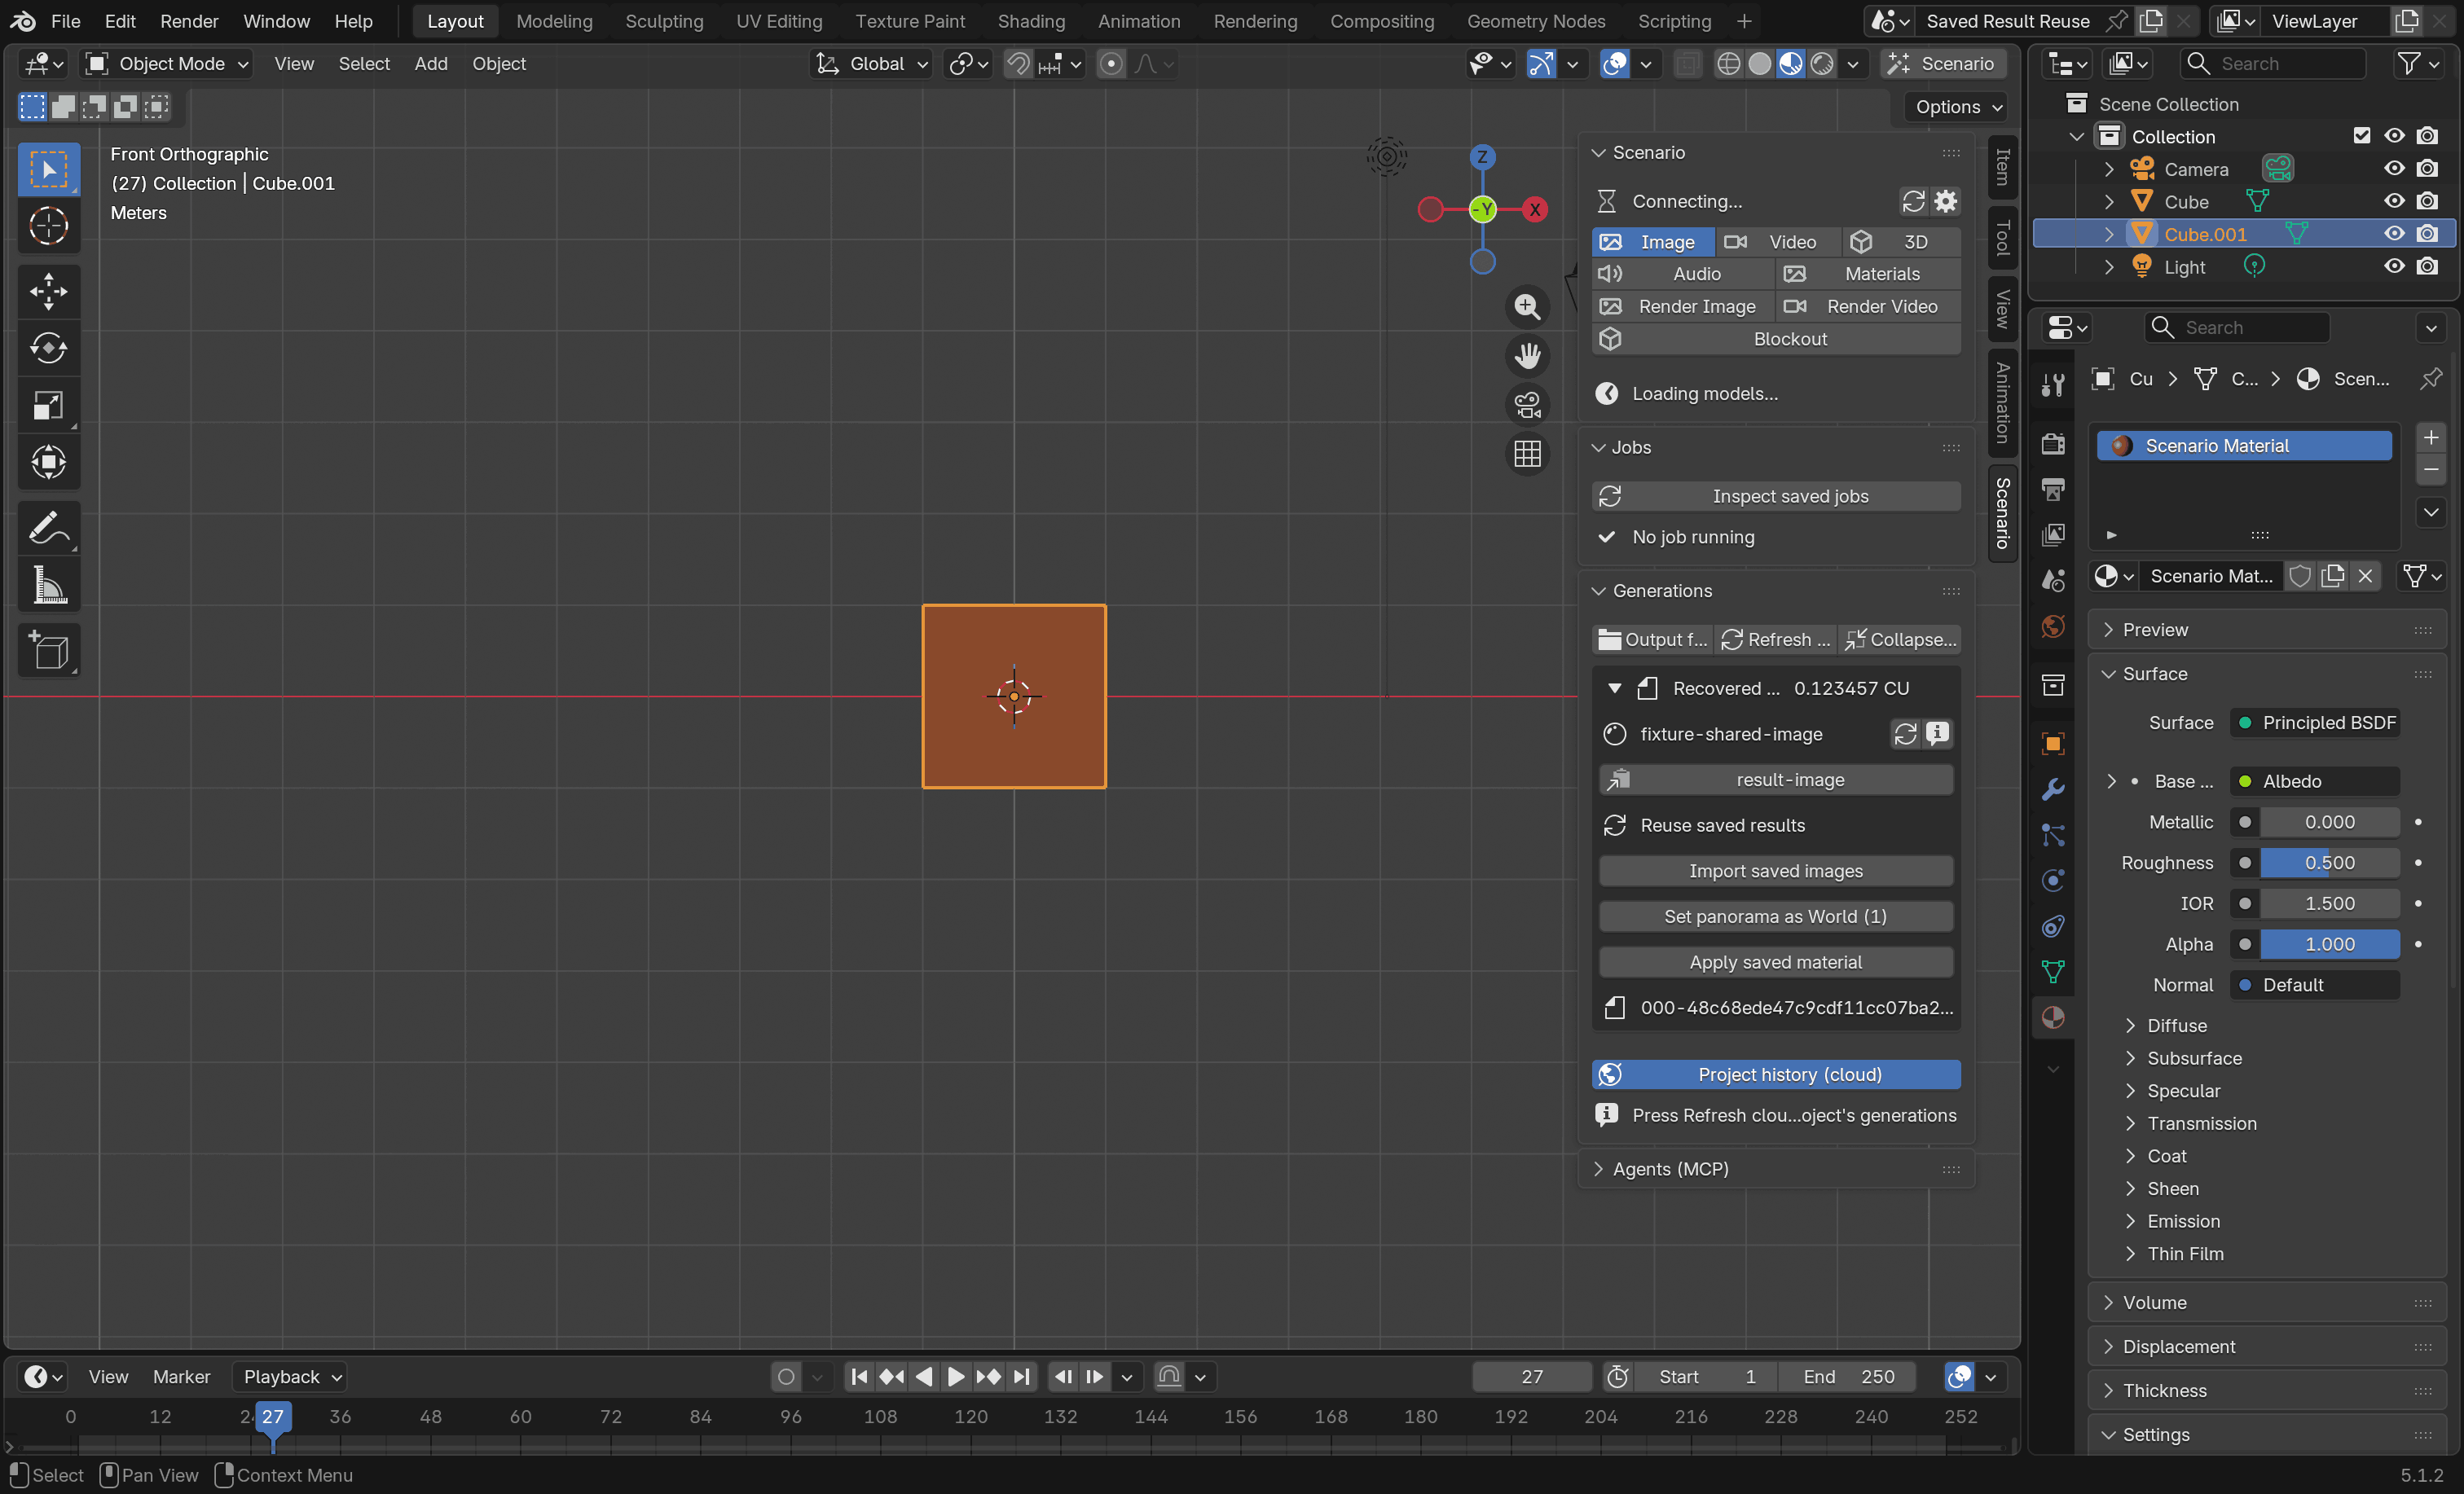
Reuse saved results on a completed job applies its saved files again, for example as another import, a material or a World, without generating or spending. Each reuse asks you to confirm its destination. Undo reverts the scene change but not the job's own controls: after undoing a World, its Restore button is gone. If Blender can't tell whether a reuse finished, check the scene: the job blocks further reuse until you choose Save import receipt. A job allows up to 128 reuse attempts.
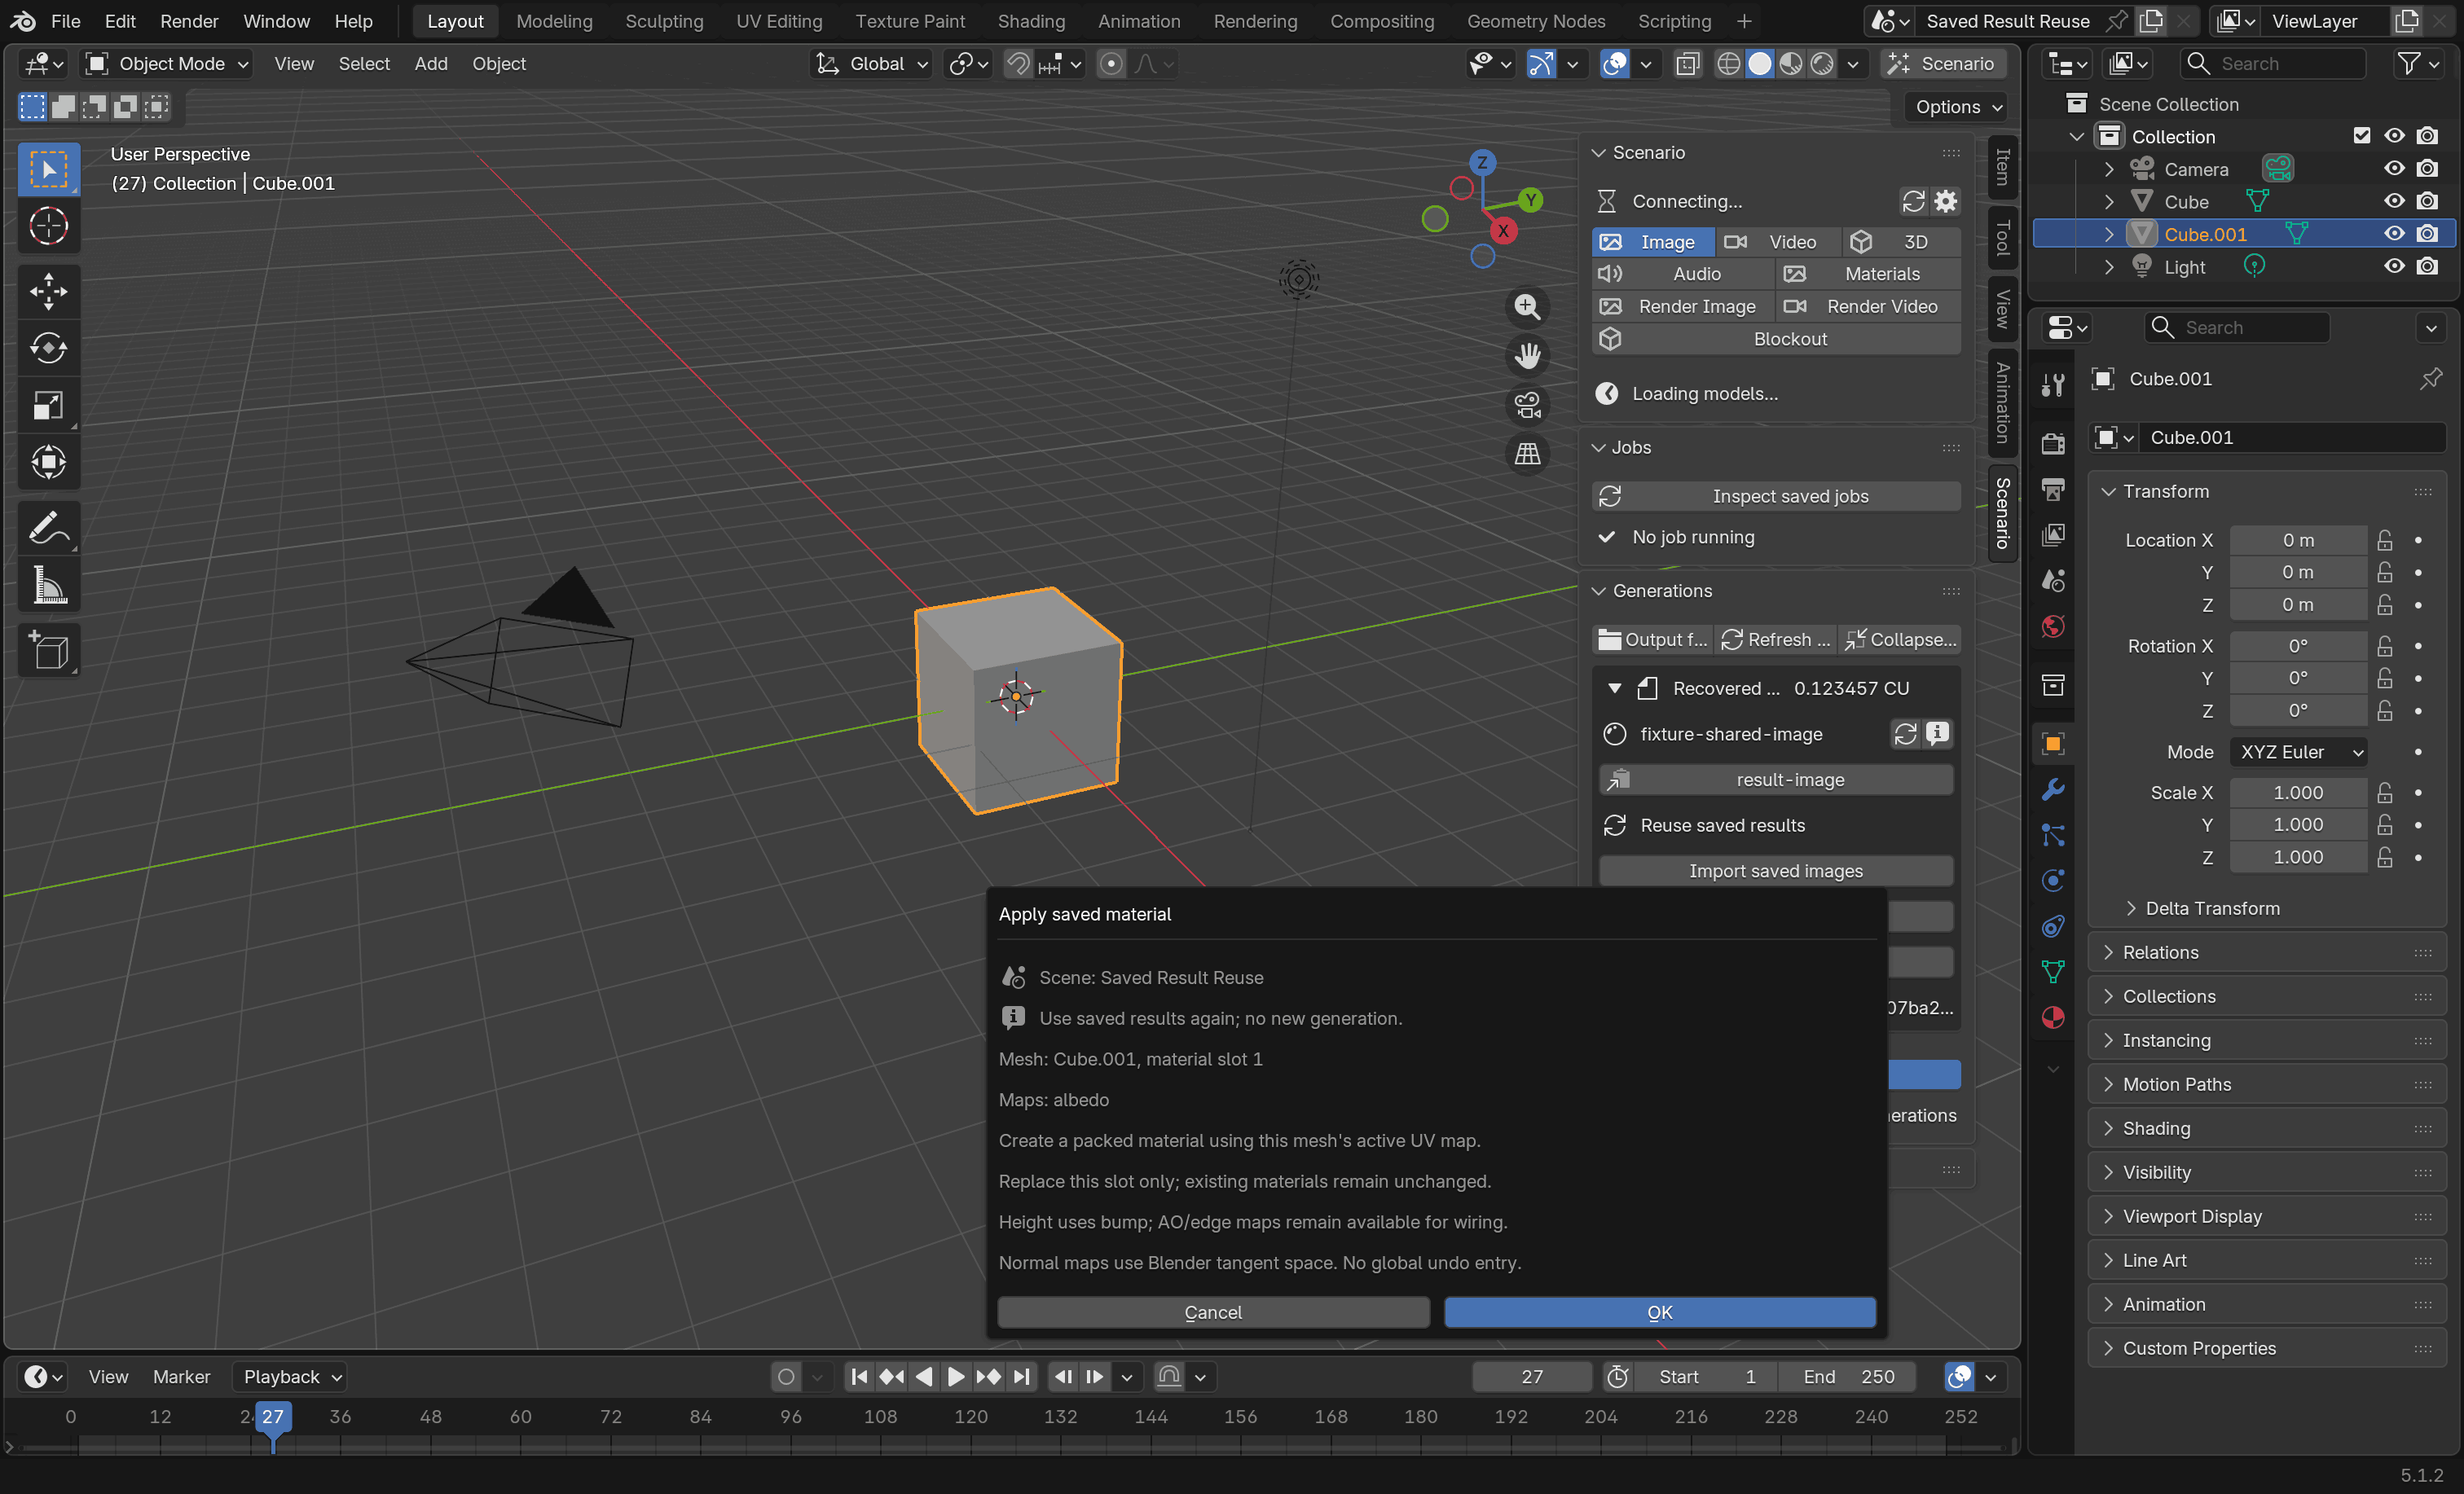
Apply a saved panorama to World
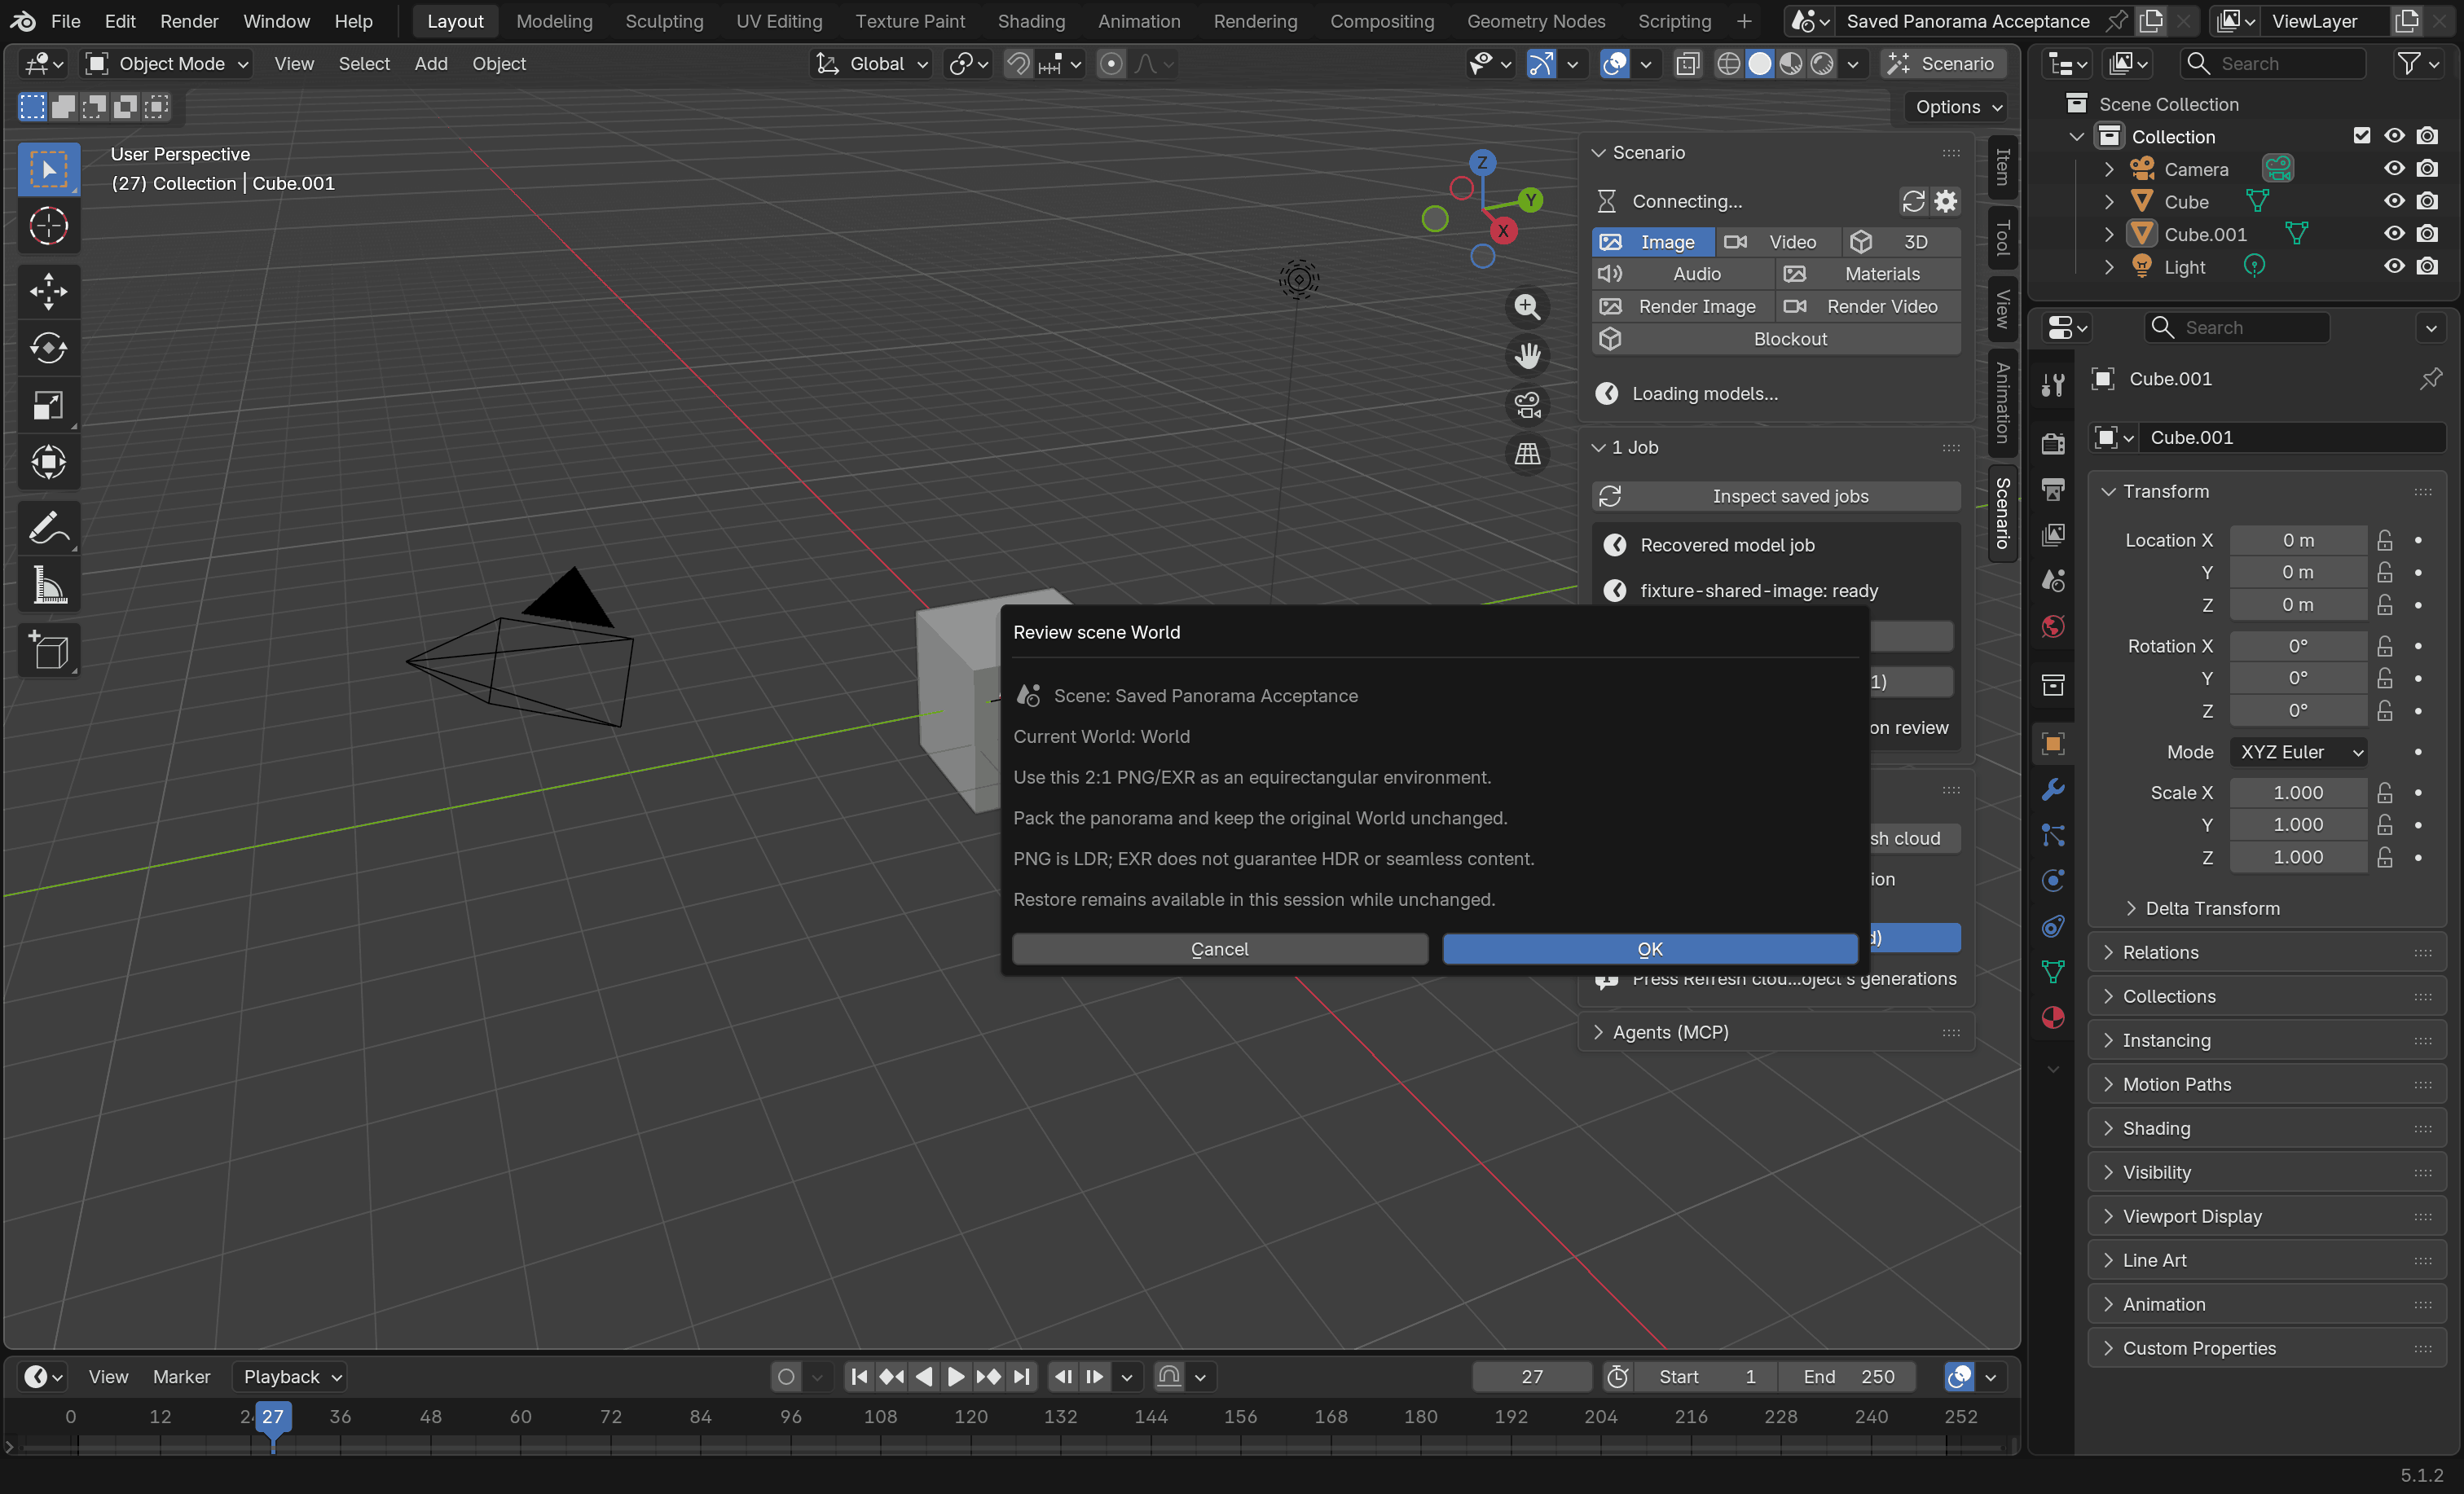
Choose Set panorama as World (N) on a saved 2:1 PNG, JPEG or OpenEXR result, including an Environment result, and confirm the scene and World. The button appears only for images that can be 2:1. Until Blender has read an image's size, it stays offered and the confirmation still checks the image. Blender uses the image as the environment and keeps your original World. A rotated JPEG, or an EXR in a color space Blender would misread, is refused; see accepted files.
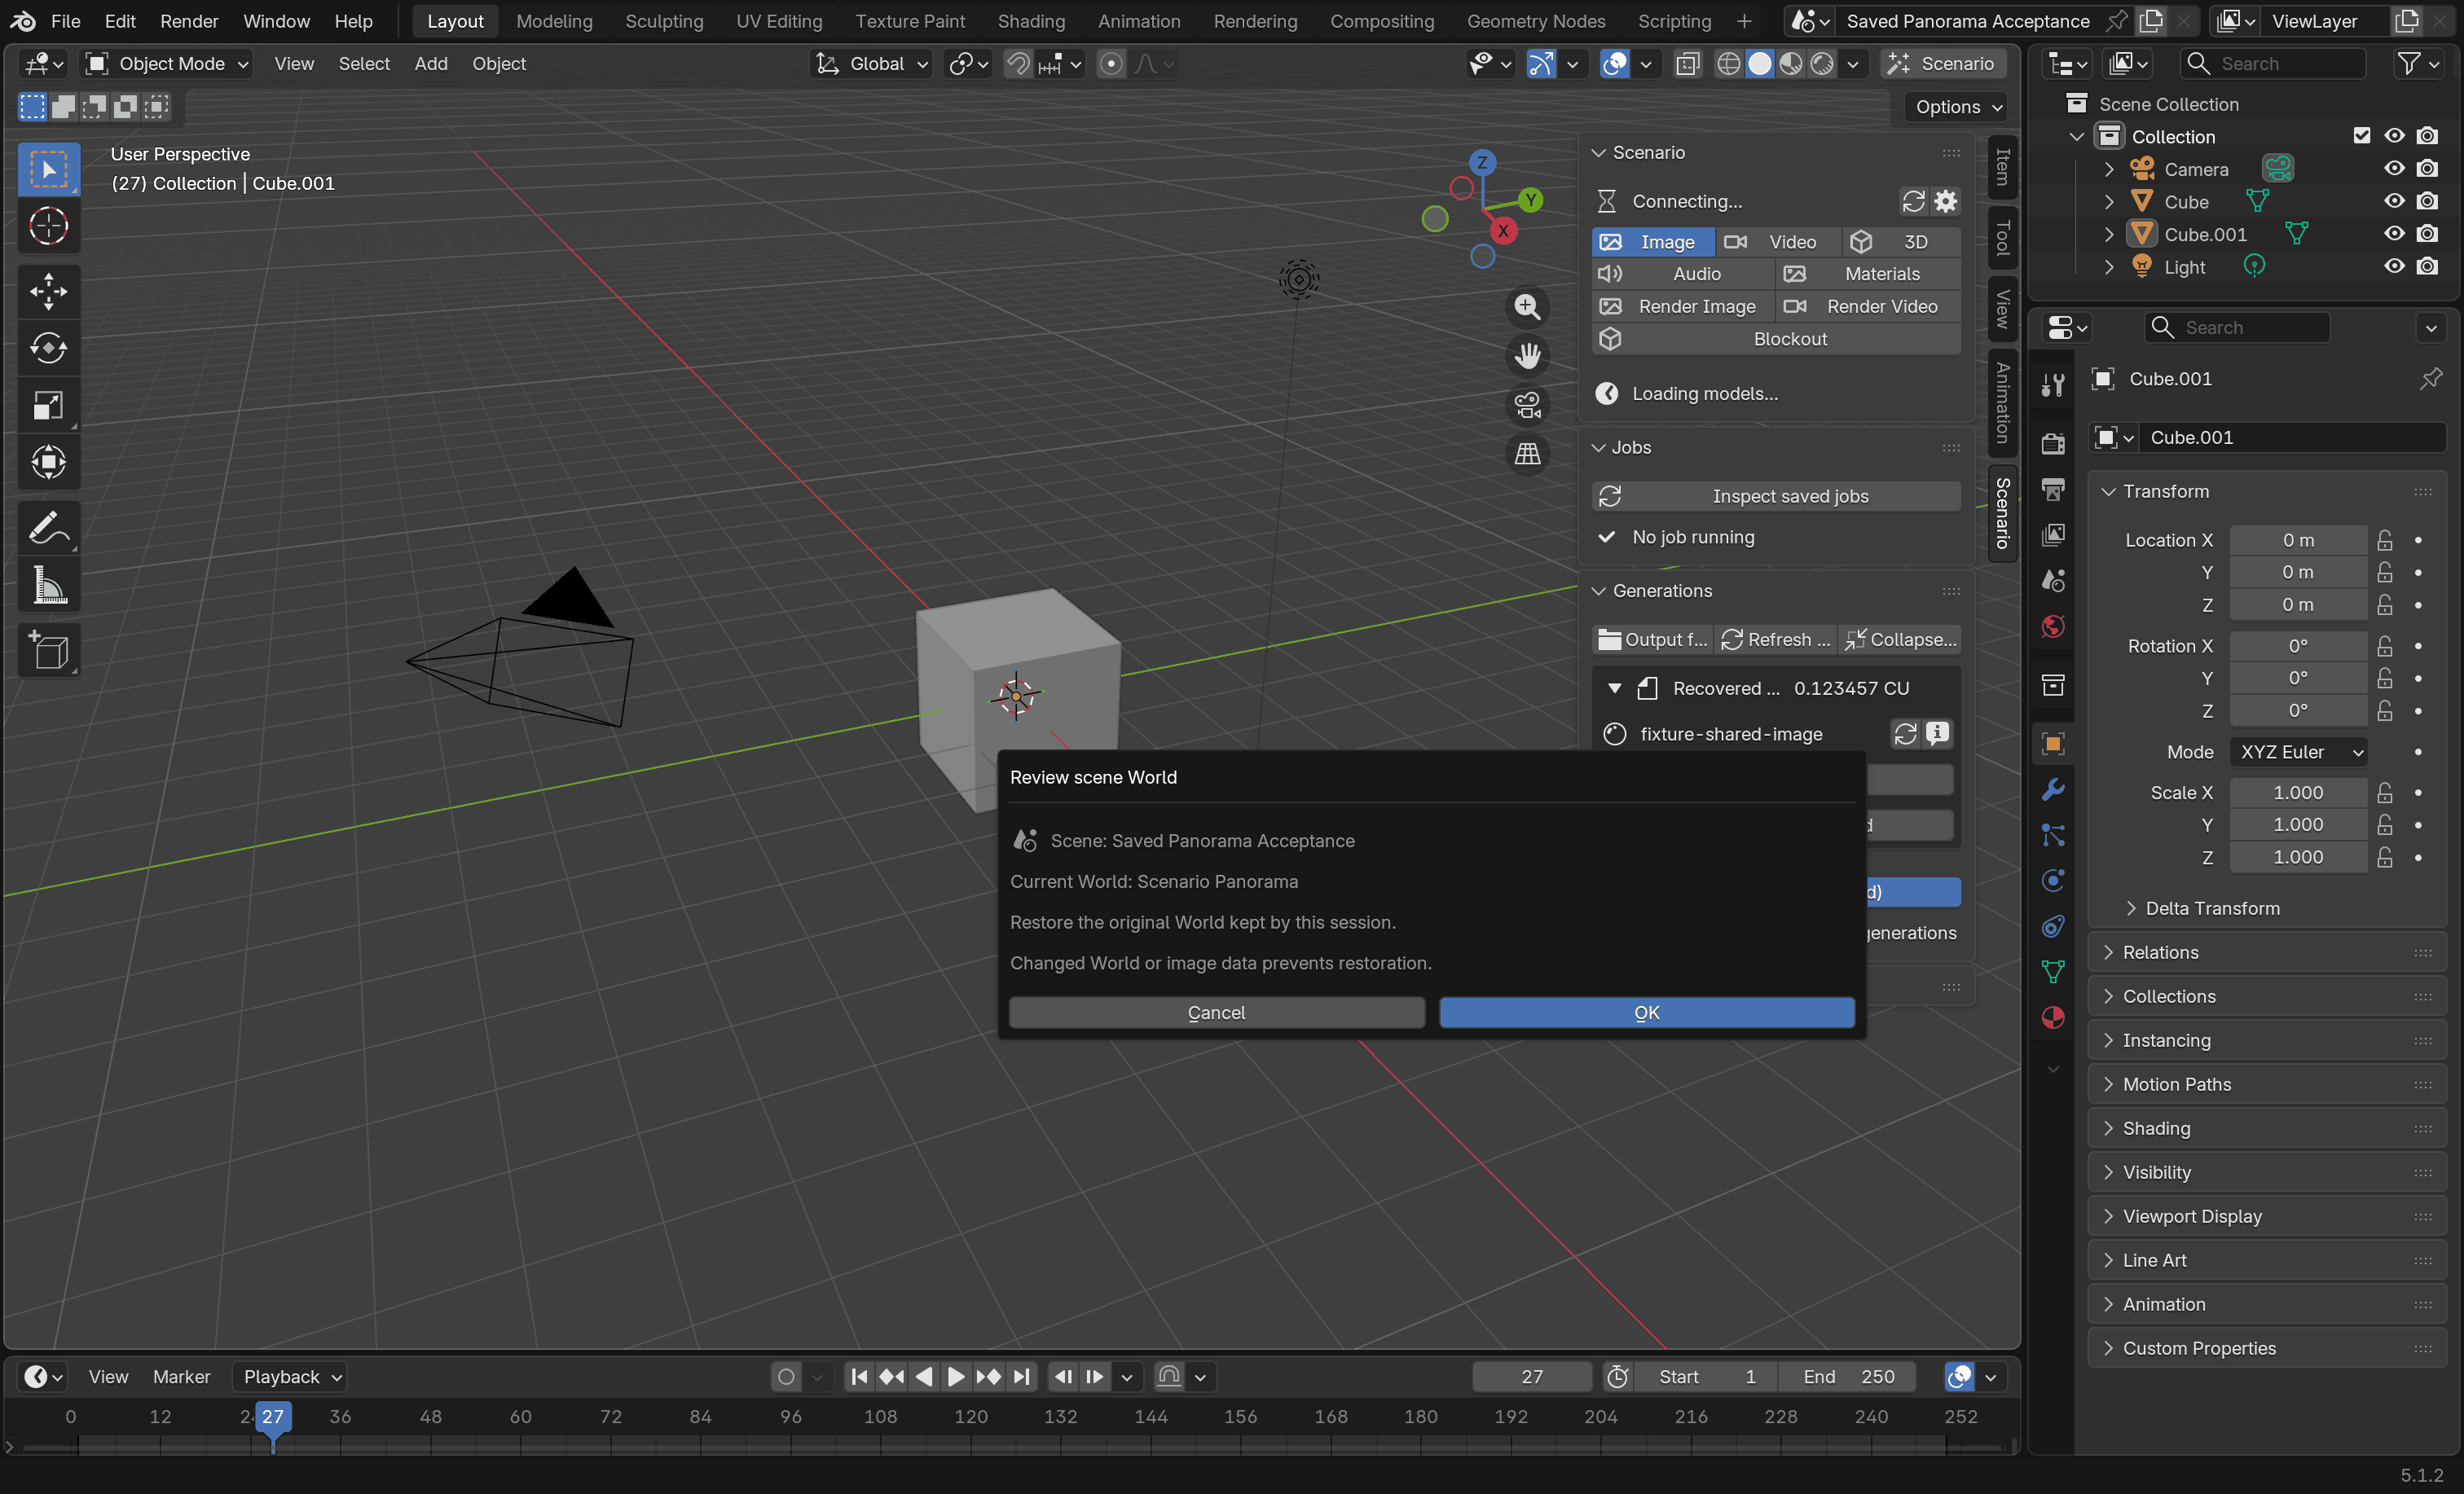
Restore previous World brings back the most recent World it replaced, during the same session only, and not if you edited the World or image since. Neither action spends anything. Save the blend file yourself.
Camera backgrounds and image planes
Set as camera background (N) adds a saved PNG, JPEG, OpenEXR, MP4 or WebM result as one more background of the scene camera, at half opacity behind objects; look through the camera to see it. Existing backgrounds stay. A video starts at the current frame and plays from a local copy that must stay available. Without a scene camera, Blender says so and adds nothing.
Add image plane (N) adds a 1 m tall plane showing a saved PNG, JPEG or OpenEXR image, its bottom at the 3D cursor, facing the Front view. Transparent parts of the image stay transparent. Check Unlit to show the image's own colours, unaffected by scene lights. Earlier results keep Add as plane, with the same Unlit option under Adjust Last Operation.
Apply a saved mesh edit
Select your mesh, then choose Apply mesh edit (N) on the saved job and pick how to apply it. The choice starts on the edit the job ran, such as Replace textures for a Retexture job, or on Attach rig when your mesh already has a rig. An Animate job starts on Apply animation when your mesh has a rig and on Attach rig when it doesn't; when the dialog says the edit is not from this job's task, pick it yourself. GLB, glTF, FBX and OBJ results can be applied: a main result in another format shows it, as in Apply mesh edit: FBX (N), and a job's other results show as Apply alternate mesh edit: OBJ (N).
- Replace geometry: geometry, UVs and materials. With Fit and verify, a result that comes back in several pieces is joined into one mesh.
- Replace active UVs or Replace textures: only when the result is the same surface as your mesh. Triangulated, split or reordered results are fine; changed shapes are refused. Replace textures also shows Keep texture: Selected faces (select them in Edit Mode, then return to Object Mode), Head or Nothing. It starts on your selection, else on the head of a mesh that stands like a character, 0.5 to 3 m tall, while Keep the head's texture is on, and the line below says how many faces keep their texture. They get your mesh's own colour, roughness, metallic and normal maps back, blended into the new texture over a short band so no seam shows.
- Replace with parts: replaces the mesh with the result's named parts, under an empty parent. When the parts are cut from your mesh's own surface, your mesh is split along them and every part keeps your UVs and materials, or the parts' own when they bring new ones; otherwise the returned parts are used.
- Attach rig: adds the returned armature and weights to your mesh, when its skin is the same surface. If the mesh already has a rig, its weights are replaced and the old rig is left as it was; Keep original keeps a copy that still follows the old rig. A mesh with a rig can only use Attach rig or Apply animation. Move the new rig group with the mesh afterwards. The bones are drawn inside the character at its size, not In Front, so the mesh stays visible; turn on In Front in the armature's Viewport Display to see them.
- Apply animation: for a mesh that already has a rig, adds the returned animation to that rig and keeps your mesh, weights and rig as they are. When the bones have the same names, parents and rest pose as the returned character, for example a rig you attached earlier from the same service, the keys are copied. Otherwise a humanoid motion, such as a text-to-motion result, is retargeted onto a humanoid rig (Meshy, Mixamo, SMPL or Unreal bone names), root motion included, the feet on the floor your rig's rest pose stands on; fingers keep their pose. Other skeletons are refused. The first clip plays, and the others and your previous animation stay in muted NLA tracks. If your scene still has Blender's default frame range, it becomes the clip's; a range you set stays.
Choose Scene coordinates or Object local coordinates for the result's positions. Fit and verify, the default for every edit but Apply animation, also accepts a result that the service resized or moved, but only when it then lines up with your mesh: exactly for UVs, textures, rigs and parts cut from your mesh, and within a small margin for new geometry and other parts. Replace geometry starts on Scene coordinates unless the job was a Remesh. If a result doesn't match, the job says why and your mesh is unchanged. Keep original (on by default) leaves a hidden copy named after your mesh. With Global Undo on, Undo and Redo restore the scene before and after the edit, but don't refund it. If the outcome is uncertain, inspect it rather than applying again. See mesh application for requirements.
Apply to captured source (N) applies the result to the mesh you uploaded, even if you have selected something else since. If you uploaded several meshes together, it reads Apply to 3 captured sources (N), for example, and applies UVs, textures or a rig to all of them at once, or to none if any doesn't match or has changed. One returned rig then drives all of them. Geometry, parts and animation need one mesh per upload. Keep original keeps a copy of each mesh.
Expanded Studio view
Studio, next to Scenario in the viewport header, opens larger pages: Create (the same form as the sidebar), Film, Workflows, Library, Jobs, Results and Connection. Switching pages keeps your work; press Esc or click outside to go back to Blender while jobs keep running. Feedback, at the top right, opens the same feedback dialog as the heart.
Run a workflow
- Open Studio > Workflows, choose Private or Public, and pick a workflow, or enter its ID and choose Load workflow inputs.
- Confirm to load its inputs.
- Fill in the inputs. Tick an input to send it; unticked inputs use the workflow's default, if it has one. File inputs accept an upload, a Library asset or an asset ID; the input shows which it takes.
- Choose Request workflow price, then Generate, and confirm.
The form saves with the scene, but prices and approvals don't survive a restart.
To upload into a workflow input, choose a File and Upload file, or a snapshot button, and confirm; uploading generates nothing. A snapshot captures the scene as it is: editing the scene, changing the frame or rendering stops a snapshot that is still sending, and it can't resume. If an upload doesn't attach, choose Inspect uploads to attach it, or to cancel it if it never started sending; Stop waiting to free the input and keep its values; or Clear reference to empty it. See workflow uploads for the technical details.
Workflows that loop (For Each), or that Blender can't check for loops, show Generate (from N CU): Scenario prices one pass, so the final charge can be higher. Check the loop's item count before you confirm.
When a workflow waits for you. Scenario can't cancel a running step, but a workflow can pause for your approval or selection. Its job then shows Workflow waits for your decision. Review the step, optionally Load previews of its images, then Approve, Select or Stop workflow and Send decision. The decision is sent once; if its outcome is unknown, wait for the step to reappear rather than sending it again.
Continuing runs the remaining steps, which spend credits; their charge isn't checked against the approved price. Stopping keeps completed steps charged.
Browse Library assets
In Studio > Library, choose Refresh to list your assets, or public ones with Public assets. Search by text, or browse a collection by its ID, then choose Refresh again. Use as reference adds an asset to a model form or, with Reference destination set to Workflow, to a workflow input, after you confirm. Existing references are kept, so remove one first to replace it; in a workflow, Clear reference empties the whole input. Changing credentials, the Project ID or the open file clears the Library.
Organize Library assets
Organize on an asset adds it to or removes it from a collection, adds or removes tags, or adds it to a new collection. To pick an existing collection, choose Load collections first. Choose OK to see a review, then Apply to send it, within 10 minutes. The card then shows what Scenario reports, such as Verified or Refused. If it says Unconfirmed, refresh and check the asset: nothing is resent automatically. These changes are free but immediate, and Undo doesn't reverse them. Rename or delete collections in Scenario's web app.
Film tasks
Film is experimental. It turns a JSON recipe into shots, a timeline, a composed master, a review scene, an exported video and a shareable case study. Every step asks for its own confirmation, and paid steps show their exact price first. See the Film reference for the full recipe format and MCP equivalents.
- Recipe and tasks: expand Film in the sidebar, load your recipe, then price and generate each model task. Save the blend file to keep the recipe.
- Shots: Prepare shot checks a shot's saved models, and Build shot creates its scene.
- Timeline: Build timeline assembles completed shot scenes into an editable sequence.
- Capture: Render capture renders a still or silent clip of a shot; Upload capture sends it to Scenario. Video needs ffmpeg and ffprobe (see Troubleshooting).
- Composition: Prepare composition, then Request price and Generate, makes a final or previs master.
- Review: Prepare review, then Build review scene, assembles your media into a new scene to watch.
- Export: Export video..., then Render video, renders a review scene to a new MP4 without spending anything.
- Case study: Export case study..., then Save case study, bundles a review with its media, recipe and costs into a ZIP. It leaves out credentials, IDs and local paths, but review it before sharing.
Good to know:
- Your working scene stays selected and unchanged. Changing it between preparing and building a review, or between choosing an export file and rendering, discards that preparation; prepare again.
- Reloading a recipe keeps its production, so a new take needs a new task name. New production starts a separate one.
- Capture files expire when the Blender session ends: upload or copy what you need first.
- If a build or upload is uncertain, inspect saved jobs and save the offered receipt; never build or send it again.
- One export or case study runs at a time. Exports never overwrite a file, and agents can export only inside the Output Folder.
- A
.blendfile can keep fragments of earlier settings, so review a case study before publishing it widely.
Agents (MCP)
The local scenario-blender server connects agents to your open scene. The hosted
mcp.scenario.com server covers platform-wide collections, training, workflows and
usage; connect both if you need both.
Each square below is one tool of the local server, grouped by family. Hover over or tap a square to see its name.
11 Scene
scene_summaryobject_detailexecute_pythonselect_objectsset_framescreenshot_viewportcamera_pathrender_stillcapture_viewsblender_api_helpdatablocks_summary
Read, select, frame, capture, render, run Python.
18 Generate & place
prepare_result_applicationapply_result_applicationread_model_textinspect_result_previewsestimate_promptapprove_promptread_prompt_resultlist_modelsmodel_schemamodel_defaultsrender_formestimate_costgeneratejob_statuswait_for_jobimport_resultcapture_referencelist_generations
Models, prices, generation, waits, previews, placement.
9 Library & uploads
list_assetssearch_assetslist_collectionsprepare_asset_organizationapply_asset_organizationasset_organization_statusupload_referencereference_upload_statuslist_reference_uploads
Your Scenario assets and reference uploads.
7 Workflows
list_workflowsworkflow_schemaestimate_workflowrun_workflowdiscard_workflow_estimateworkflow_job_stepsdecide_workflow_step
Run Scenario workflows step by step.
5 Jobs & recovery
recover_reference_uploadrecover_local_joblist_local_jobscancel_prepared_jobrecover_cloud_job
Pick up jobs after a crash or restart.
5 Blockout
estimate_blockoutapprove_blockoutprepare_blockout_planblockout_plan_statusapply_blockout_plan
Prompt to grey layout, priced and approved.
33 Film experimental
prepare_film_compositionfilm_composition_reviewestimate_film_compositiongenerate_film_compositionprepare_film_reviewfilm_review_statusbuild_film_reviewfilm_export_sourcesprepare_film_exportrender_film_exportfilm_export_reviewfilm_case_study_sourcesprepare_film_case_studyexport_film_case_studyfilm_case_study_reviewfilm_capture_sourcesprepare_film_capturerender_film_capturefilm_capture_reviewupload_film_capturefilm_timeline_sourcesprepare_film_timelinefilm_timeline_reviewbuild_film_timelinefilm_shot_sourcesprepare_film_shotfilm_shot_reviewbuild_film_shotfilm_recipeestimate_film_taskapprove_film_taskdiscard_film_estimatebind_film_upload
Shots, timeline, capture, composition, review, export.
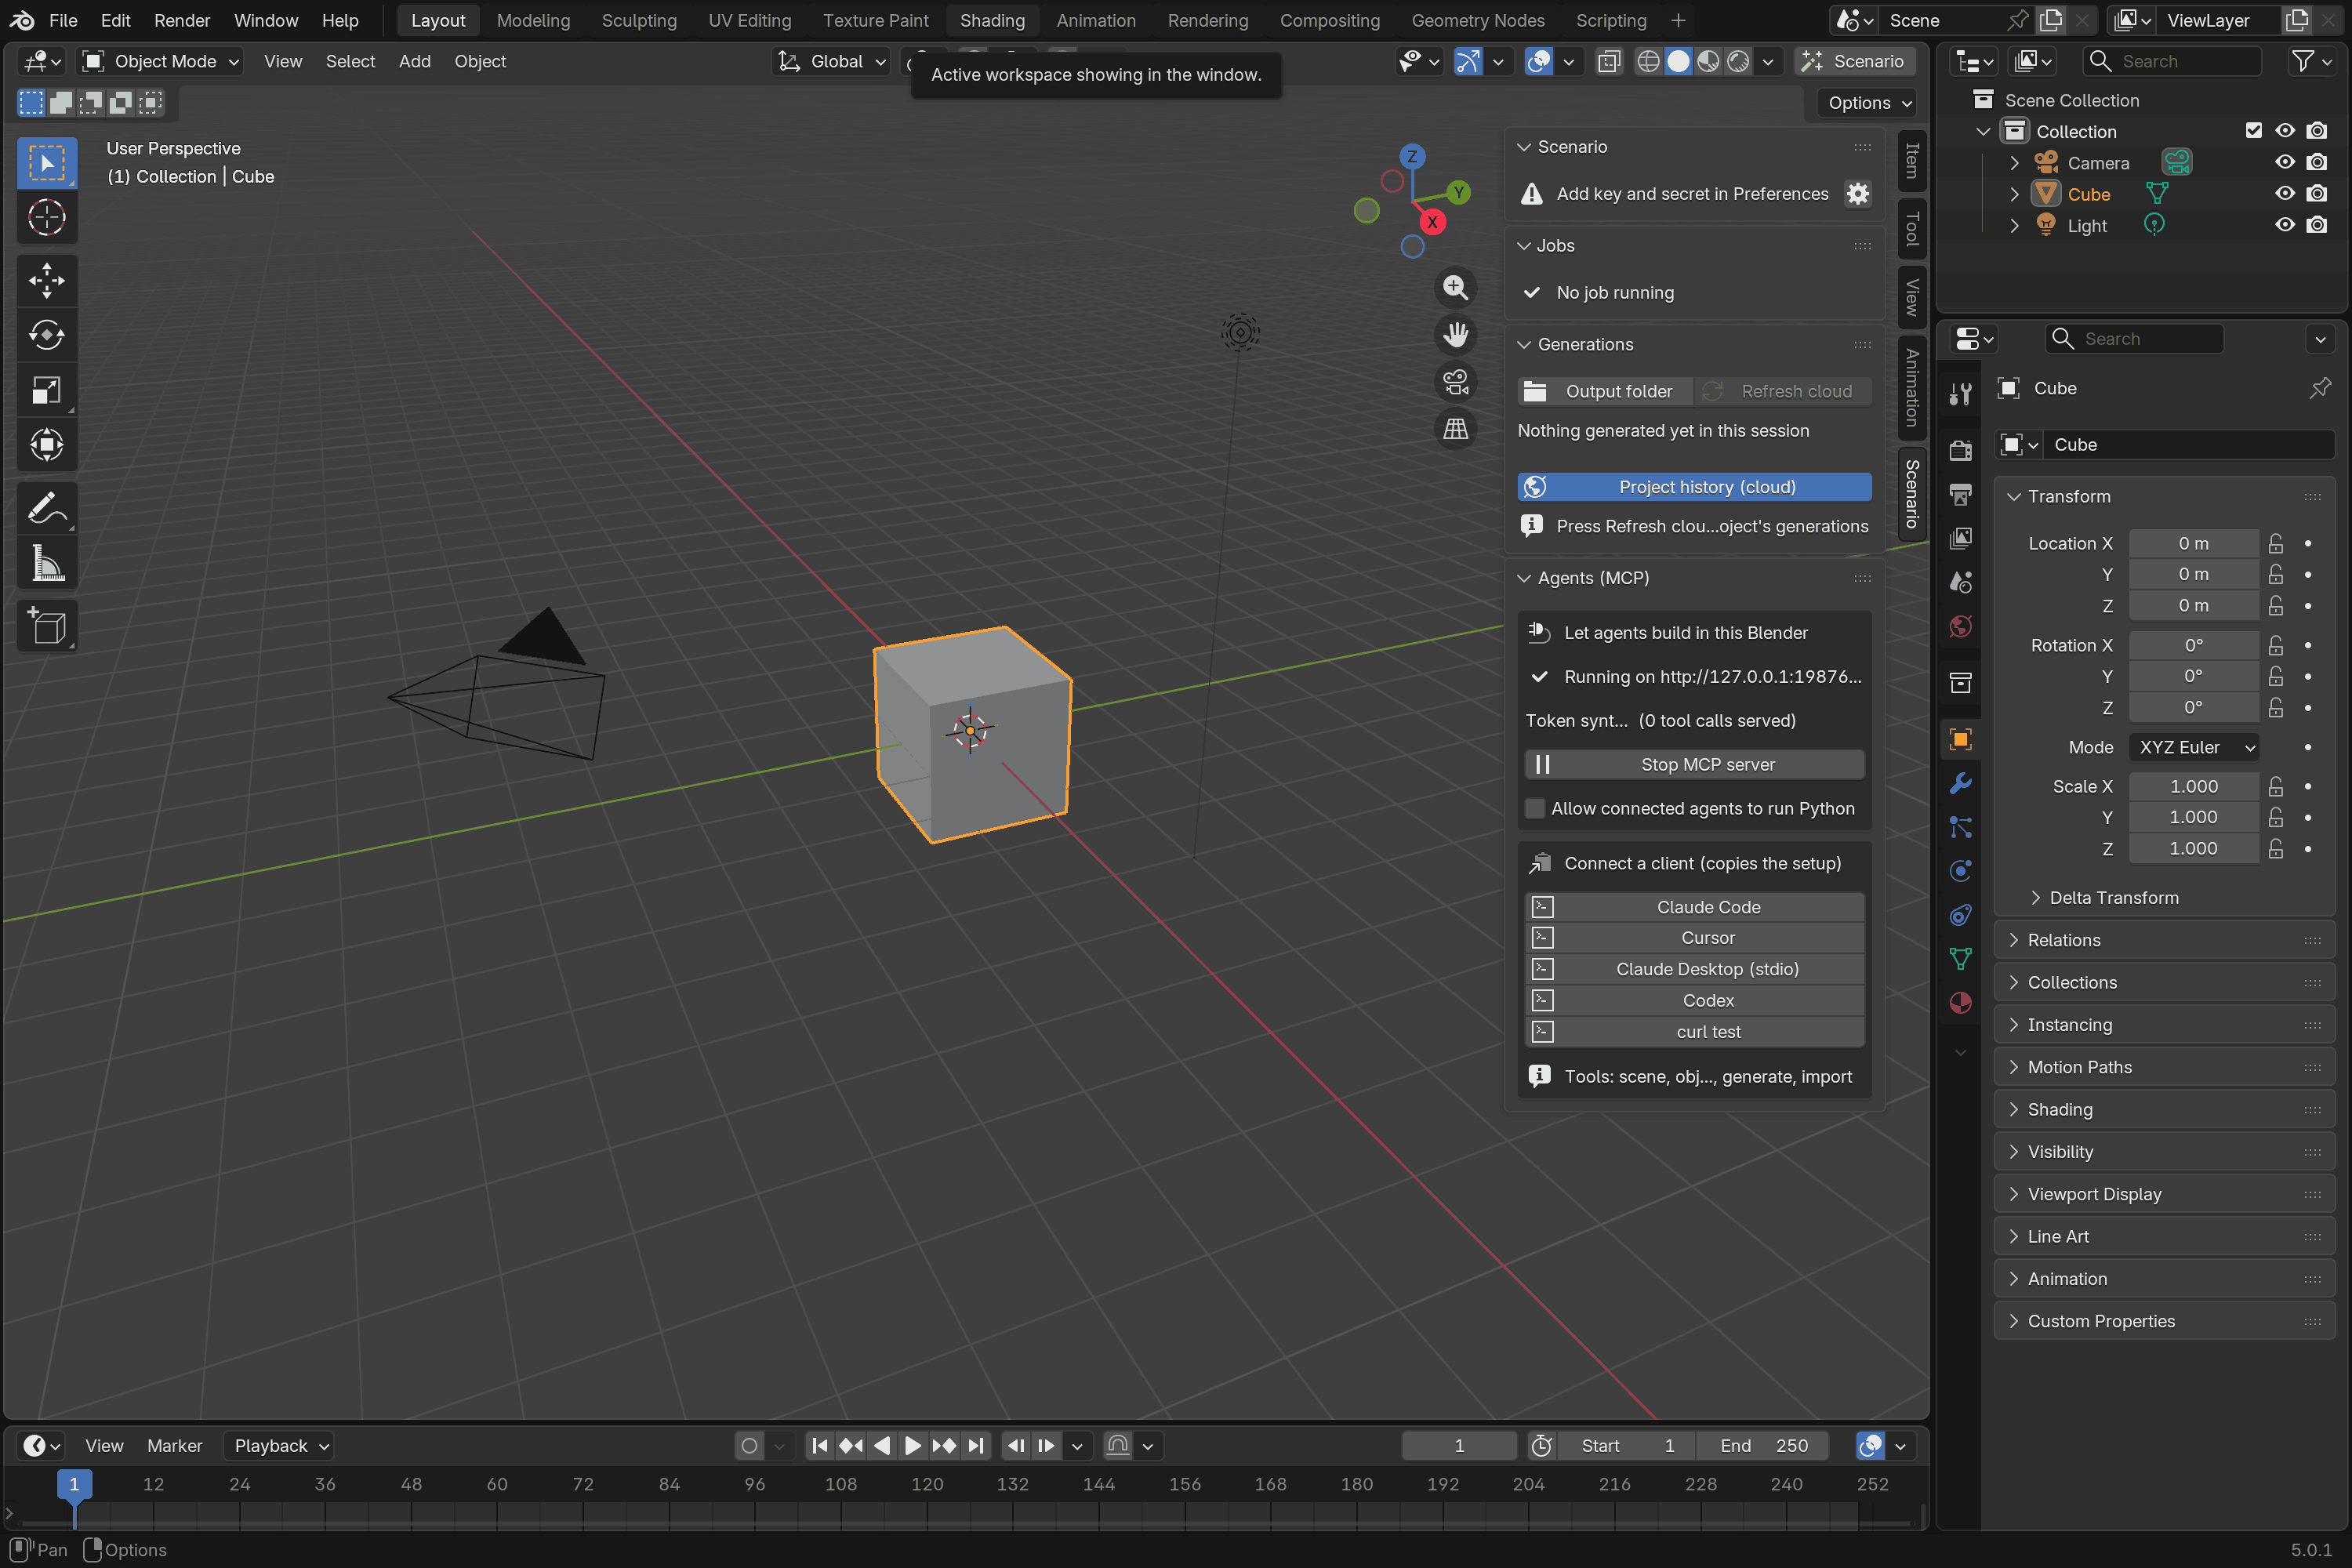
The local server starts on its own while Allow Online Access is on and accepts connections only from this computer, and an agent can upload only files Scenario saved or files you chose in Blender during this session.
In the Agents (MCP) panel, Connect a client has a button for each of
Claude Code, Codex, Cursor and Claude Desktop found on this computer: it adds the
scenario-blender server to that client's configuration file, keeps the other
servers, copies the previous file beside it and shows what it wrote. Then reload
the client. You can also copy a setup instead. The server needs no token, so any
program on this computer can connect. Allow connected agents to run Python is
off by default. For headless use, run
blender --background scene.blend --command scenario_blender. The
MCP reference covers tools, setup and security.
Agent changes mark the file as modified and can be undone, but agents can't save: save the file yourself.
Costs
Prices are in Creative Units (CU) and depend on the model, settings and references.
- Generate (N CU) is the price of the form as it stands. After a scene change, such as a selection or a frame change, it is priced again once the scene is still (Scene changed; updating the price).
- Above Confirm generations above in the extension's preferences (500 CU by default; 0 asks every time), Generate and Generate blockout first ask you to confirm the model and exact price. Agent requests keep their own approval. Repeat Last never generates again.
- After you generate, the button keeps its price and comes back a moment later, once Scenario confirms the job. Change anything to price a different request.
- from N CU means the final price may be higher: some references aren't uploaded yet, or a workflow loops or can't be checked for loops.
- Price shown after the upload means a required mesh or capture is still missing.
- Scenario can refuse the first price of a reference it has just received. The form then asks again on its own for about a minute (Upload not ready yet; retrying).
- When a price fails, the sidebar offers Estimate again. If Scenario reports two different uploaded meshes as one asset, it offers Price without captured source instead: the result then has no Apply to captured source.
- Prompt helpers and Blockout designs are paid separately.
- If a price check ever starts a job on Scenario, prices stop until you restart Blender and nothing is sent again.
- With an empty Render Image or Render Video look and automatic Spark on, the look has its own price before the render's. Turn Spark off to use the photoreal default instead.
See the known limitations for current spending limits.
What leaves your machine
With online access and credentials enabled, price checks send your prompt and
settings to https://api.cloud.scenario.com as you edit. Generating can send
reference files, captures and exported meshes, and spends credits. Catalogs and
thumbnails load from Scenario, and cloud history loads when you ask for it.
Sign in with Scenario signs in and renews its session at clerk.scenario.com.
Saved credentials, prompts, jobs and media stay on your machine. A connected local
agent can read your scene and request paid work. Share anonymous usage data, in
the extension's preferences, is off by default, and the Scenario panel asks once
after you connect; turned on, it tells Scenario which commands and agent tools you
use, never your prompts, files or account. Feedback sends your rating, message and
optional email, only when you press Send, with your extension and Blender versions
and system type, plus your install ID while usage data is shared. See
Privacy and data handling for details.
Files and folders
- Results: your Output Folder (
~/Downloads/Scenarioby default), under<kind>/<YYYYMMDD>/. - Film videos: the
.mp4file you choose, by default in the Output Folder'sFilmsubfolder. - Caches, jobs and strip media: the extension's own folder under Blender's extensions directory. Uninstalling Scenario deletes it.
- Your key: stored as plain text in Blender's
userpref.blendpreferences file, unless you use Environment credentials (switching doesn't erase saved values). To remove it, clear both fields and save preferences; rotate the key if it leaks.
Troubleshooting
- "Scenario needs Blender's Allow Online Access": press Allow Online
Access below it. Blender started with
--offline-modemust be restarted without it. - "Loading models..." doesn't end: check your credentials (Test connection) and Allow Online Access. A Retry button appears if the request failed.
- HTTP 401 or 403: check the key and secret, or sign out and sign in again. If a 403 mentions the Project ID, check that it belongs to the key, or clear it; signed in, choose another team and project.
- "Prompt is required" / "Add a reference to see the cost": fill in the prompt or add the required reference.
- "Select the mesh to edit": the 3D tab's Edit mode needs a selected mesh.
- "Rig the selected mesh first": a text-to-motion model in Animate plays on your mesh's armature; give it one with Rigging first.
- "Animation not applied; the rig is unchanged": nothing moved; the rest of the message says what to change. "Rig the mesh again with Edit 3D > Rigging" means your rig is not one a humanoid motion can be retargeted to: rig the mesh with Rigging, then choose Apply animation on the saved job again.
- "This model takes no image/video input": choose another model in the Render lane.
- The result doesn't appear: check Generations for an error. Use Inspect saved jobs and Resume download instead of generating again. After an update, restart Blender.
- A 3D model looks untextured: switch the viewport to Material Preview.
- The render moved things around: use a cleaner capture (Grey clay, camera view), fewer style images, and describe materials and light rather than content.
- The sidebar doesn't look like the composer: the sidebar follows your Blender theme.
- Film can't find ffmpeg or ffprobe: Film checks Blender's PATH and the usual Homebrew, MacPorts and Linux folders. Elsewhere, or on Windows, add the tool's folder to the PATH Blender starts with.
- An agent can't connect to Blender (connection refused): the local server
runs only while Blender is open with Allow Online Access on. Open Blender
first, or press Start MCP server in the Agents (MCP) panel if you stopped
it. Then reconnect the agent: run
/mcpin Claude Code, start a new Codex session, or restart Cursor or Claude Desktop. - Codex reports that
SCENARIO_BLENDER_TOKENis not set: its setup still names a token variable. Press Connect a client > Codex, or runcodex mcp remove scenario-blenderand copy the Codex setup from the panel again. - The panel says the port is in use: another program, often another Blender or Blender MCP add-on, holds the MCP Port, and the server does not move to another one, so saved agent setups keep pointing at this Blender. Close the other one, or set MCP Port in the extension's preferences, press Start MCP server, and copy the setup again.
- An agent's call times out: some clients stop waiting after 60 seconds,
Codex by default (
tool_timeout_sec). The outcome is unknown: Blender may never have started the call, or may still finish it. Ask the agent to check the scene or the job's status before trying again, and never to generate again blindly. - Where are the logs? In Blender's system console (Window > Toggle System
Console on Windows, the terminal on macOS and Linux), prefixed
scenario. - Still stuck? See Support.
Explorations made in Blender
Scenario's explorations are films, scenes and 3D projects made with Scenario, each with a look at how it was made. These were built in Blender, several of them by an AI agent. Some used earlier versions of the extension, so their steps can differ from this guide.
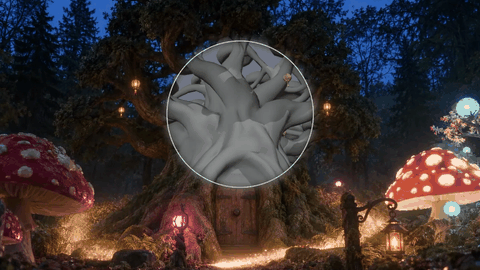 The Last Lantern
 Previs to Picture
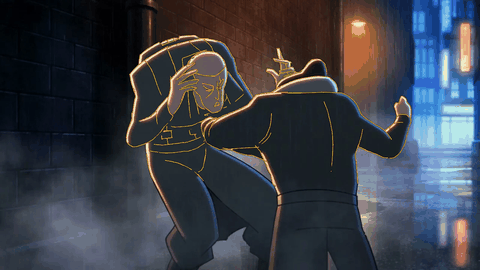 Grease Pencil to Final Frame
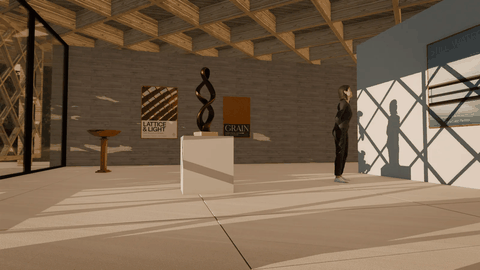 Pavilion
 Paper Harbor
 Island Builder
 Lamplight Deep
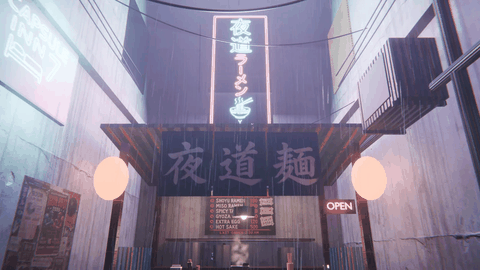 Last Order
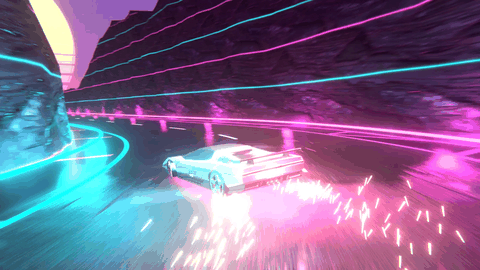 Neon Drift
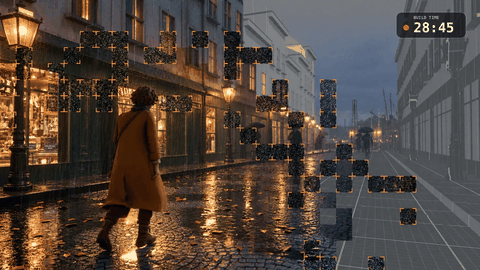 Twenty Minutes
 Hadal
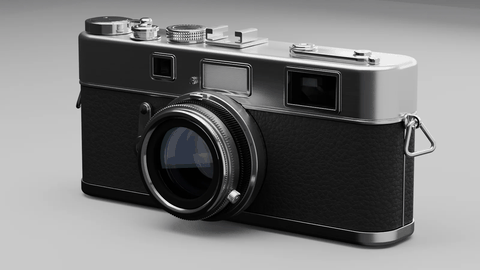 Two Rulers
 The Stones Remember
 Hold On
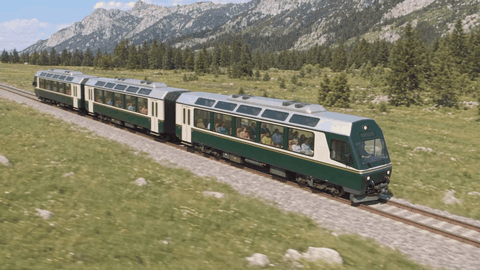 Impossible Rides
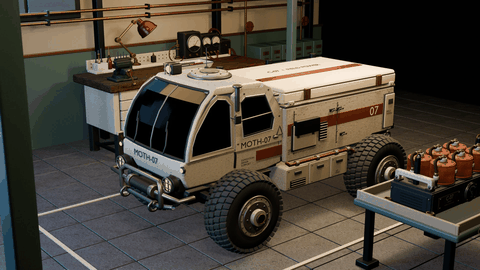 The Last Repair Shop
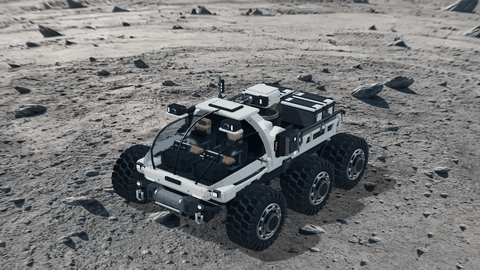 Rover Foundry
Known limits
See known limitations for current limits, and the architecture map for what is still being integrated.
Licence
Scenario for Blender's first-party extension code is free software under the GNU General Public License, version 3 or (at your option) any later version (GPL-3.0-or-later), without any warranty. The full text is in LICENSE. Bundled dependencies, adopted sources and assets retain their original licences and notices; see the repository licence notice.
Blender is a registered trademark of the Blender Foundation. Scenario for Blender is an independent extension, not published by or affiliated with the Blender Foundation. See the trademark notes.